

Salesforce Lightning Email Templates allows users to create pre-designed email templates with dynamic fields, images, & links that can be used to communicate with customers and stakeholders.
Steps to create Lightning Email Templates in Salesforce:
In this blog post, I am going to send a custom welcome email to the newly onboarded contacts in the organization.
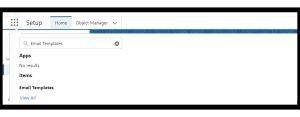
1. Click on Salesforce App Launcher, type “Email Templates”
2. Click the “New Email Template” button.

4. Enter the new email template’s basic information like Name, Related Entity Type, and Description.
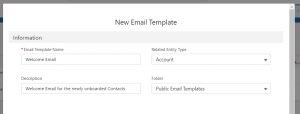
Note: As Salesforce’s best practice, always consider adding a description to the email templates you are creating in order the make it relevant to other users in your org. when they try to edit this email template in the future.
Want to Learn Salesforce Flows? Checkout our Salesforce Flow Course
Initially, you may not be able to see the Edit in builder button because your user does not have permission to see this button in the org.
To get the permission we need to create a Permission Set and Assign it to our user.
Creating Permission Set
1. Setup > Quick Find Box > Select “Permission Set”
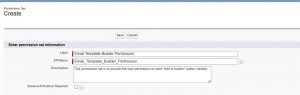
2. Click on the “New” button and provide Label and description for the Permission set.
3. Once the permission set is created, navigate to “System Permissions”
4. Under system permissions search “Access drag-and-drop content builder” and enable it.

5. Once the permission set is configured we need to assign it to the user using manage assignments.
6. Click on the “Manage Assignment” button and select your username. Click next.
NOTE – While Permission set assignment we also have the option to set the specific expiration date.
Once the permission set assignment is done we can the see “Edit in Builder” button on our Welcome Email lightning email template
Configuring Lightning Email Templates:
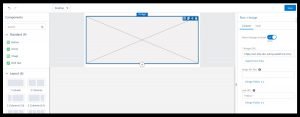
By clicking on the Edit in Builder button you will be redirected to the Email template builder

- It consists of different attributes which you can utilize in your custom email template creation. It also consists of six standard template layouts under the Layout drop-down.
- Here, you can provide email template details like template name, description, etc. Using the style panel you can update your email templates body as well as the background color.
- This is the main canvas where you can configure all the elements of your email template
In this example we are going to create a welcome email template for the new Account enrolled in the company.
We will start designing the email template by adding an image to email template. To do so we need to add the image component from the standard component panels.
As you can see in the above image you can add the Image URL or select the image from your system which you want to display in the email.
NOTE: It is considered a best practice to add an alternate description to the image in the email template.
In case the image is not loaded in any user’s system they can see the alternate text describing the image for them.
Once you have uploaded the image you can also change the image width using the Image width attribute under the size dropdown.
Now I will add the Rich text component to our email template designing Canvas. A rich text component will allow us to provide dynamic email text for each user in our org.

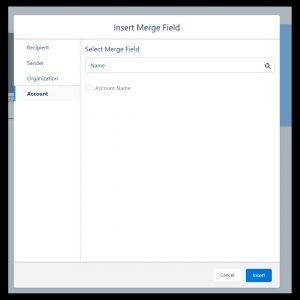
To add custom fields such as name, address etc. click on merge field button under the rich text panel.

Select the object and field you want to include in the email text. Here I have selected the Name field from the Account object
You can also associate a text in your email template with a link to redirect your user to a particular website or knowledge article in case they are facing any issue.
This can be done by selecting the text and clicking on 🔗 icon under content panel of your rich text component.
IMPORTANT- It is advised to save your email template at each step of its creation.
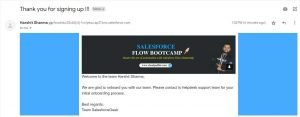
I created a flow to trigger this lightning email template and this is how it will be visible to the users in their mail inbox
Check this out – The Complete Salesforce Flow Bootcamp
Advantages of using lightning email templates in Salesforce
- Lightning email templates allow users to create pre-built email templates that can be used repeatedly, saving time and effort.
- It allow users to insert merge fields, which enables personalization of emails, making them more relevant and engaging.
- You can customize the look and feel of email templates with company logos, colors, and fonts, ensuring that all communications are consistent with the brand.
Business Scenario
Create a Lightning email template for a new employee onboarding to your team providing him/her with a button in the welcome email to order their onboarding kit.
HINT: you can use the button component available in the Standard components panel.
For business scenario solution please checkout the video below !!


