In this blog post, we will see how to use Salesforce Flows in a list view. We will achieve this by crafting an Auto-Launched Flow that triggers upon clicking a custom button.
To start off, let’s discuss Auto-Launched Flows and how we can execute them.
Auto-Launched Flow
It is used when we don’t need any user interaction to run the Flow manually or run by something other than a platform event, record change or schedule.
It gives the user the power to run an automation whenever needed.
Different methods to trigger an Auto-Launched Flow:
- A Custom Button can be placed on the page layout and visibility criteria are set to control when the button is visible or hidden. After the user clicks the button, the Flow is initiated.
- We can even use a Sub-Flow element in the parent flow to refer to and run the child flow.
- We can utilise other automation methods like Apex code, Visualforce pages, API calls from an external system or Flow orchestration to run the Flow.
What is a List view in Salesforce?
A list view represents a method for users to visually engage with a collection of records within a given object, be it accounts, contacts, opportunities or others.
It provides the capability to apply filters and sorting parameters to this record list, thereby enabling the execution of various actions on the records, ranging from deletion to exportation.
Steps to create List View in Salesforce
Navigate to the object where you wish to create a List view.
Click on the ⚙ gear icon and create a new List view.

Add a filter criteria to the List view
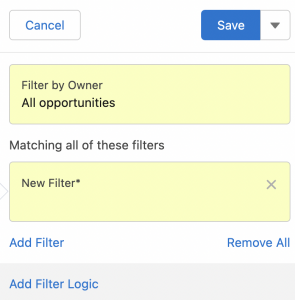
Click on the “save” button to store the recently created list view.
Business Scenario
Update Case Status to ‘Closed’ of required records from List View when the user clicks a custom button.
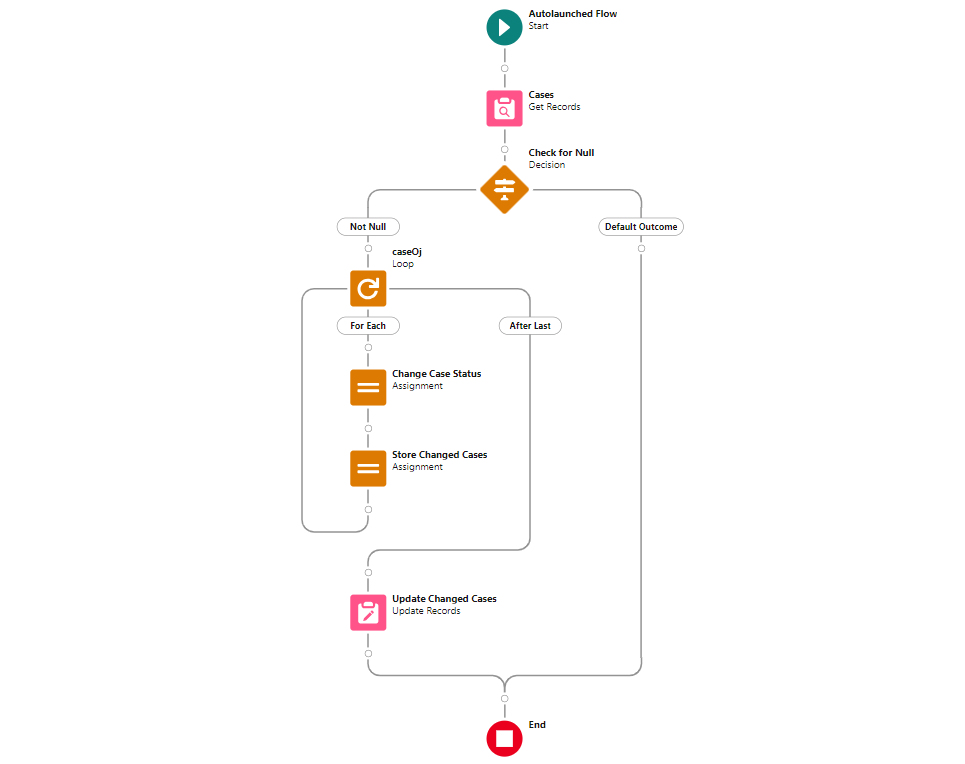
Use the Get Record elements to fetch all the Case object records the User selects and which are to be ‘closed’.
- Create a new Variable Resource with API Name ‘ids‘ which is a Standard Name used to fetch selected records from a List view with Data type ‘Text’. Mark the checkbox for ‘Allow Multiple Values‘ as TRUE as we will be fetching multiple records and mark it available for input.
- Required Condition is to fetch all the Records with a Status does not equal to ‘Closed’.


Use the decision element to check whether the records fetched in the Get record element are not null.
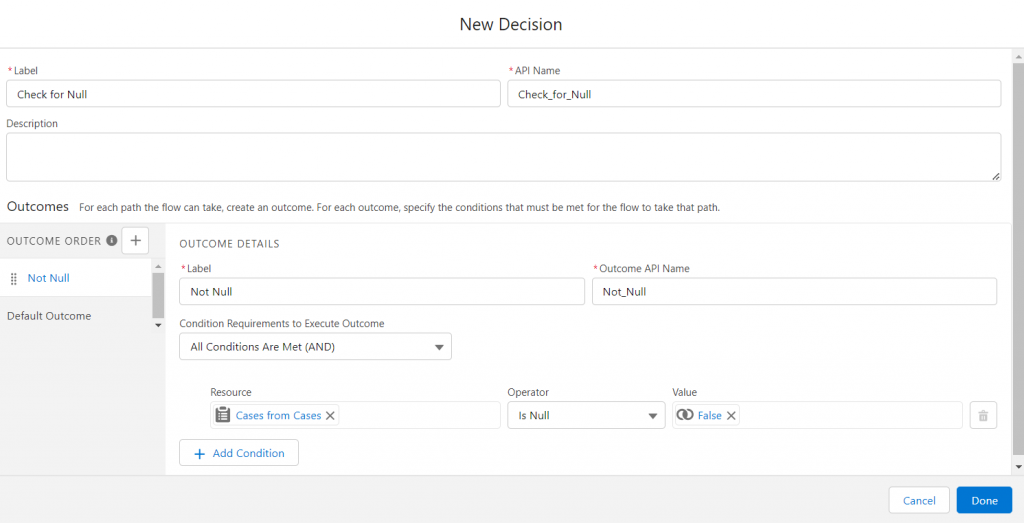
Add Loop Element on Not Null path

Add an Assignment element on the ‘For each‘ path to update the Status value of the record to ‘Closed‘.

Generate Variable Resource of ‘Record’ Datatype. We will allow multiple values because we store multiple records with updated statuses.
Want To Learn Salesforce Flows? Checkout our Salesforce Flow Course


The Update Record Element updates the changed cases.

Save the Flow and Activate. Go to View Details and versions of our Flow and copy the URL ‘/flow/Change_Case_Status‘
Add Custom Button on List View
Navigate to Object Manager and select Case object.
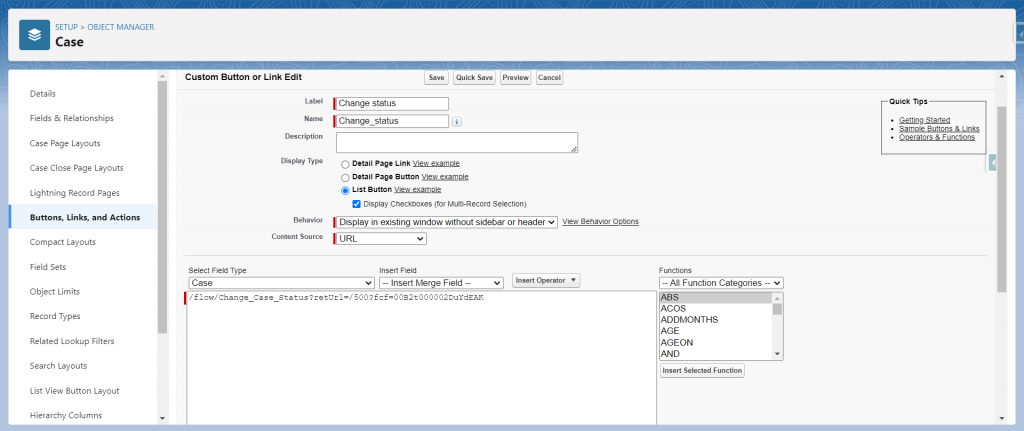
Navigate to ‘Buttons, Links and Actions’ in order to generate a new custom button. The Display type of the List view is ‘List Button‘.
Select The Display behaviour as per your requirement, in this example, we are selecting ‘Display in existing window without sidebar or header‘.
The content Source is URL as we are using the flow URL ‘/flow/Change_Case_Status’.

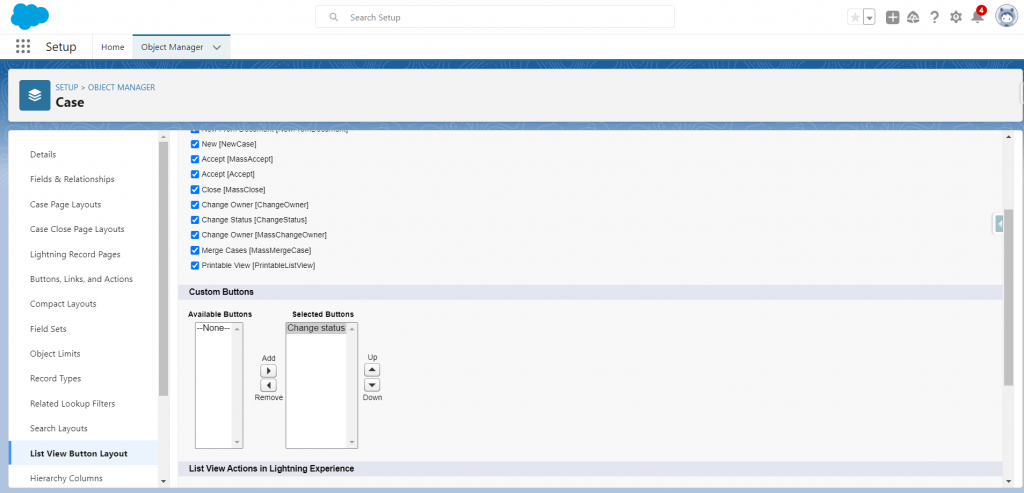
Go to List View Button Layout and click on Edit. Select the created Button ‘Change Status’ from the Available buttons and Save the layout.
Once we refresh the Case Record page, we can see the Change Status button. Click on the ‘Change Status‘ button to update the Status to closed on the selected records. We can see the records in ‘ Today’s Closed Cases‘.

Customize the Control Finish Behavior:
When redirecting the user to another page within Salesforce upon completing the Flow, use ‘retURL’ in the flow URL.
In our Flow, we want to redirect the user to the list view, so we need to use ‘objectCode?fcf=listViewId‘ where the objectCode for Case is ‘500‘ and the listViewId is ‘00B2t000002DuYdEAK‘. Click the ‘Quick Save’ button.
Advantages of using an Auto launched flow
- When and how to execute an auto-launched flow is decided by the User, thereby making it flexible for use.
- As user interaction is not necessary and it runs in the background, auto-launch Flow is suitable for data transformation.
- Debugging tools and testing environments are already provided by Salesforce to ensure accuracy.
FAQ
What is the difference between Screen flow and Auto-Launched Flow?
- The Screen Flows require User interaction, whereas the Auto-launched doesn’t have any User interaction.
- In screen Flow, user input drives the Flow, while an auto-launched Flow runs in the background based on predefined criteria or events.
- Users employ Auto-launched Flows to automate repetitive tasks, while they use Screen Flows for business processes that require user input at various stages.
Read more – Types of Flow in Salesforce
Can we Schedule an Auto-Launched Flow?
Winter ’20 release made it possible to schedule an auto-launched Flow before which scheduling was only possible by implementing a Schedulable interface. We can set the Flow date, time and run frequency: once, daily or weekly.

Can we run a Flow within a Flow?
Yes, using a sub-flow element allows the user to run a Child flow within a parent Flow. The Input and Output variables allow the user to carry the input from the parent Flow to the child Flow and then output from the Child flow back to the parent Flow.


