


Have you ever wanted to collect files directly when creating new records in Salesforce? With Salesforce Flows, you can! This blog explains how to use Salesforce Flow to add files to records with a screen element that contains a file upload component, allowing users to attach documents while creating records – all in one go!
Why Use Flows with File Uploads?
Imagine collecting signed contracts while creating new account records. Flows with file upload components allow users to upload contracts during record creation, making everything more organized and efficient.
Business Scenario
Screen Flow to Create Contact Records from Account Object and Upload Files for Contact
Create a New Screen Flow
Navigate to Setup > Flows and click New. Choose “Screen Flow” as the flow type.
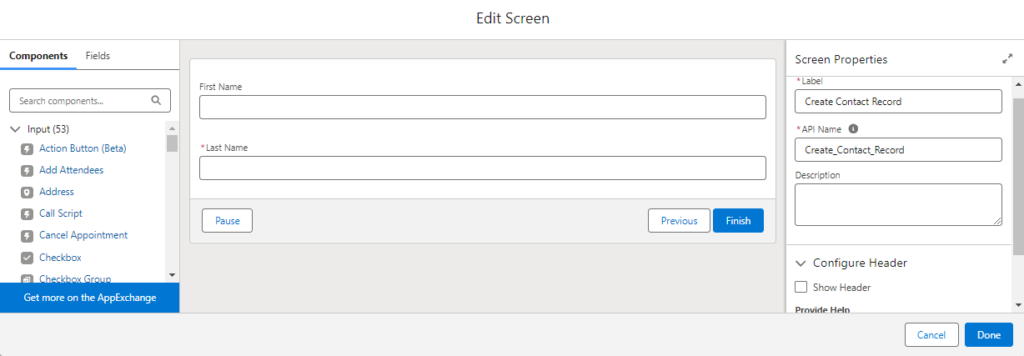
Add Screen Component
Add a screen component to the canvas in the Flow Builder to get data for the fields in the new Contact record, such as first name and last name. Use Text components and make “Last name” as required.
Add Create Record Element
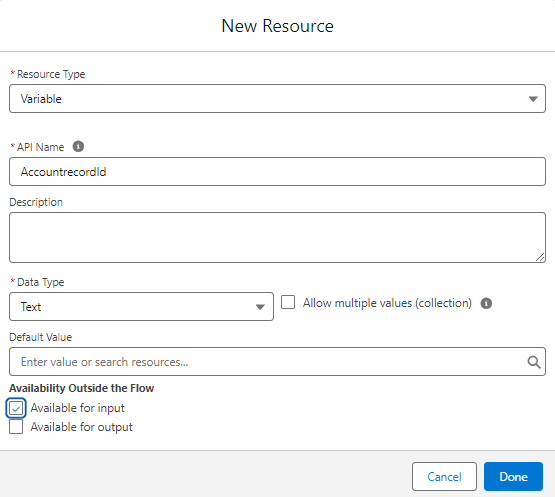
Pre-requisite: Create a new variable resource of data type “Text” for Account Record Id.
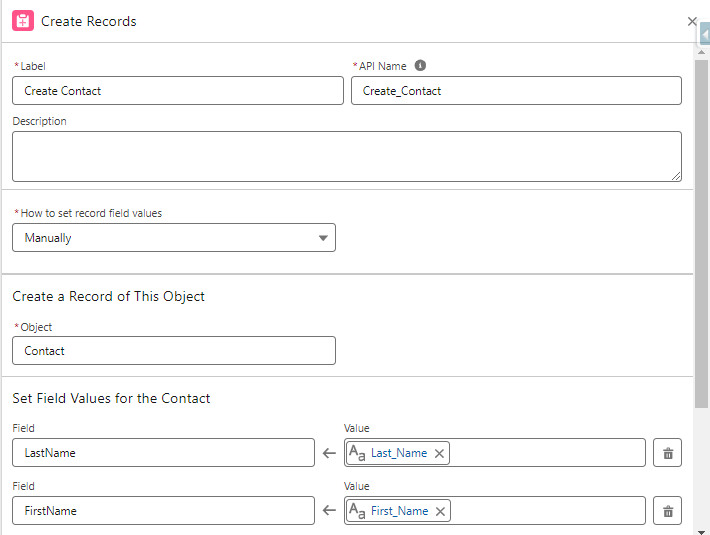
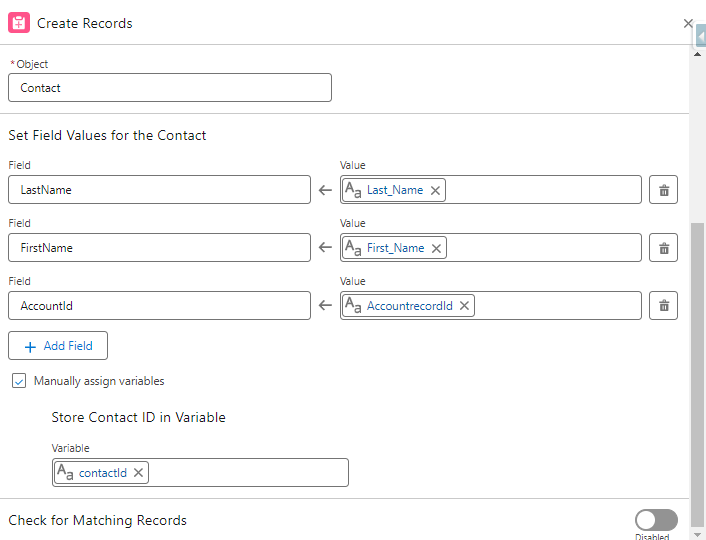
Add Create Record Element with Object as “Contact” and map the fields as shown below.
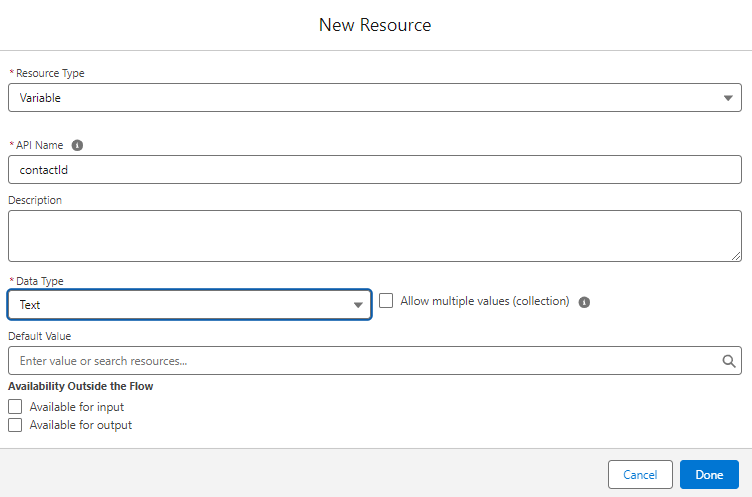
Mark the checkbox for “Manually Assign Variable” and add a new resource with the Data type “Text”. Hence, the newly created record ID will be stored in “contactId”.
Click on Done to save the details of the Create Record Element.
Also read: Top 8 Salesforce Flow Limits
Add Screen Element
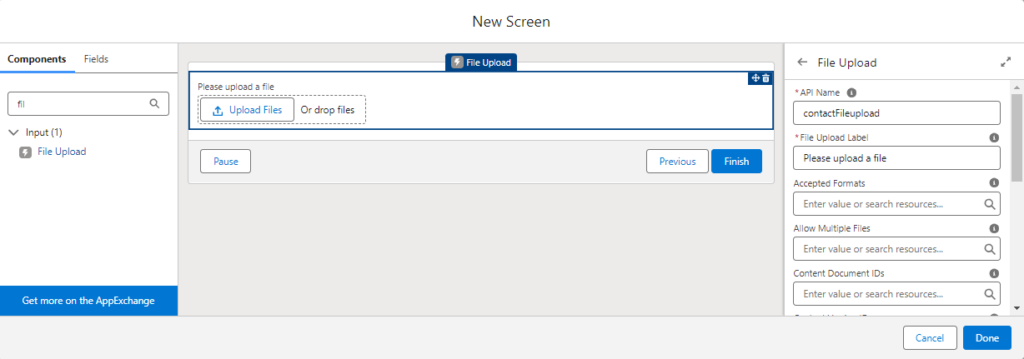
Drag and drop the “File Upload” component onto the screen. Set it up by:
Adding a Label: This tells users what file they can upload.
Choosing Allowed File Types (Optional): You can specify what files users can upload (e.g., only images like .jpg or .png).
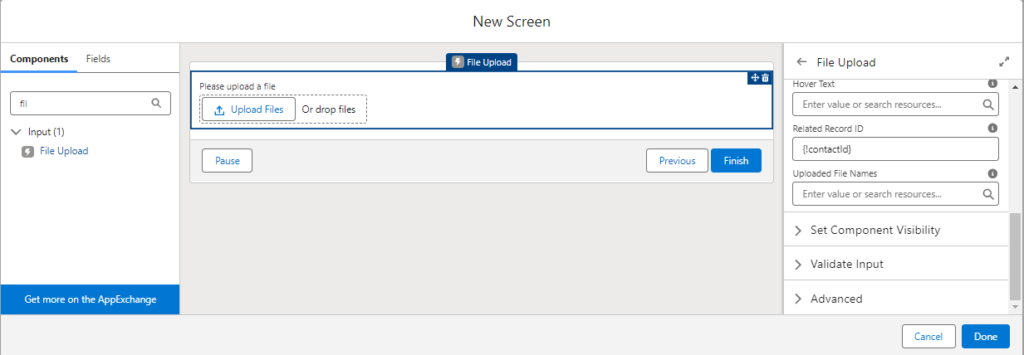
Assign the Related Record ID as {!contactId}
Add Flow to the Record page:
Navigate to the desired Account record. Click the gear icon in the top right corner and select “Edit Page.” It opens the Lightning App Builder interface.
Locate the “Flows” section on the left. Drag and drop your chosen flow onto the specific area of the Account record page where you want it.
Select the created flow and Configure the layout for the flow component as needed.
Click “Save” to finalize and activate the page to make the flow functionality live.

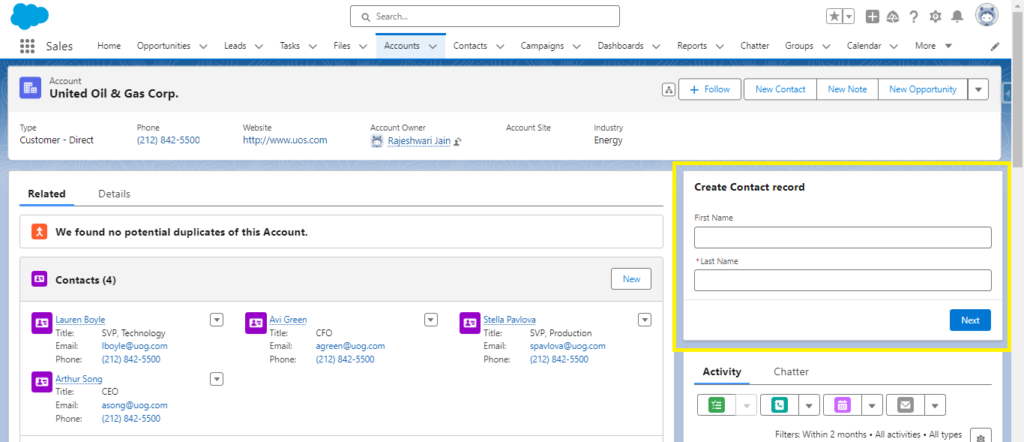
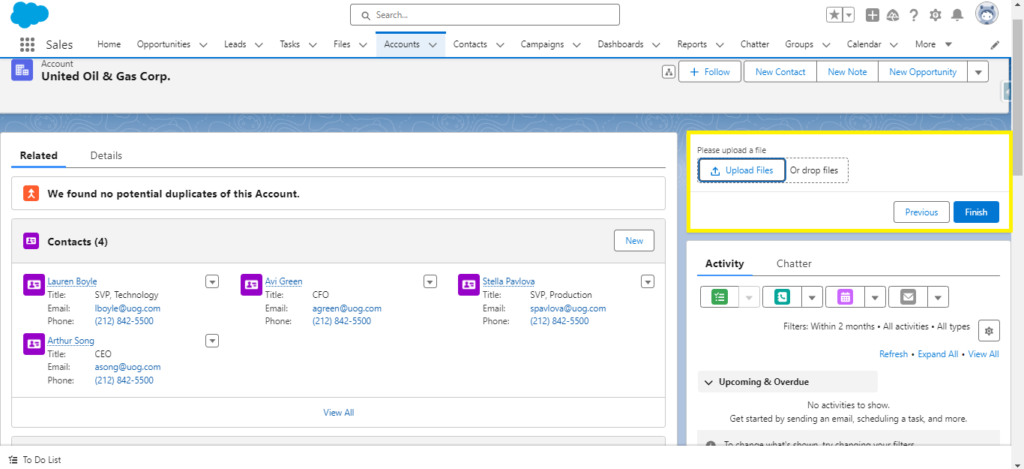
This is how the flow appears on the Account Record page, which allows users to create records and upload files.
Want to Learn Salesforce Flows? Checkout our Salesforce Flow Course
FAQs
1. How do we assign the uploaded file to the newly created record?
When configuring the File Upload component, you can assign the related record ID to the record ID of the newly created record, ensuring that the uploaded file is correctly linked.
2. Why should we use the File Upload component in a Screen Flow?
Using the File Upload component in a Screen Flow allows users to attach files directly during the record creation. This makes the process more efficient and ensures that all necessary documents are collected simultaneously.
3. Can we restrict the types of files that users can upload?
Yes, you can restrict the types of files users can upload by specifying allowed file types in the File Upload component settings.
4. What are some everyday use cases for using File Uploads in Screen Flows?
- Upload signed contracts when creating new account records.
- Attach images or documents to case records.
- Collect identification documents during user registration processes.
Conclusion
Adding file uploads to your Salesforce Flows makes data collection more efficient and organized. Users can use Salesforce Flow to add files to records and upload necessary documents while simultaneously creating records and capturing all essential information.
Whether collecting signed contracts, attaching images to cases, or gathering identification documents during registration, the file upload feature in Salesforce Flows effectively meets your needs.


