

Salesforce clouds be it sales, service, or any other are designed to assist in the sales process of our customers. From managing prospects, and contacts, to generating leads and converting them to Salesforce CRM clouds, Sales Cloud in this case assists in every process.
Customers dealing with the B2B marketing process are aware of how important lead generation is for a successful sales conversion. Considering sales marketing in digital platforms it is pretty important to attract large visitors and generate new leads out of them.
The sales and marketing teams can work on these leads to get their contacts and create opportunities accordingly for enhanced sales. This is where the web-to-lead process works.
Introduction to Web-to-lead forms
The method where we use a website form to capture information entered by visitors and store that information as new leads in our cloud is called the web-to-lead process. This information obtained helps track opportunities, leads, and closed deals.
By default, Salesforce provides the below-mentioned lead sources for users to generate leads from :
- Web
- Phone Enquiry
- Partner Referral
- Partner
- Public Relations
- Trade Show
- Word of Mouth
- Employee Referral
- Purchased List
- Other
When we use web-to-lead forms; the leads generated by this process assign the leads under the “web” category automatically.
How to create web-to-lead forms
With the help of web-to-lead forms, we can generate up to 500 leads daily to work on and get customers. Let us now build a web-to-lead form
Step 1: Over setup enter “Web-to-Lead” in the quick find box and select the option
Step 2: Click on the “Edit” option in the “Web-to-Lead Settings” section. Then click on the checkbox “Web-to-Lead Enabled”
You can notice there is another option below web-to-lead enabled which says “require reCAPTCHA Verification”. This is something which one can enable to reduce spam leads and reject any lead which is obtained without verification. For any org which is created after Winter’19, this option is checked and enabled by default.
Step 3: Similarly one can even add any user with Modify all Data and Send Email permissions as “Default Lead Creator”. Any lead which gets created online will have the user’s name as Created By in the lead record
You can even choose a “default response template” in a similar manner if you wish to send automated email replies to the prospects.
Step 4: Click on “Save” and on the same window click on “Create Web-to-lead Form”.

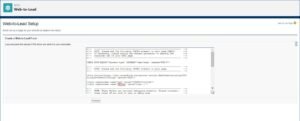
Step 5: In the Web-to-Lead Setup section under Create a Web-to-lead form section choose the fields that you want to be in your form; and the information that you wish to collect from leads.

If you wish to add the reCAPTCHA widget to your lead submission form, select “Include reCAPTCHA in HTML”. This setting is automatically selected and is read-only when Require reCAPTCHA Verification is enabled
Step 6: Click and “Generate” button and copy the HTML code generated. This needs to be incorporated into the website’s code.
Want to Learn Salesforce Flows? Checkout our Salesforce Flow Course
Leveraging ChatGPT to create web-to-lead forms
We are aware that now ChatGPT can be easily integrated into our Salesforce CRM clouds. It is helping us to write better LWC codes, create reports via Einstein AI and even analyse the same.
The integration even helps in creating web-to-lead forms in Salesforce. The HTML code received after making a web-to-lead form can be enhanced pretty well with ChatGPT-Salesforce integration to add better CSS styling components and even embed LWC functionalities into it. For instance, if a date field in your form has a limitation where the user cannot add any date lesser than 01/01/2000 then we can use chatGPT to personalise it.
Using ChatGPT we can find an error code for the situation and add it in the HTML we generate for web-to-lead form in Salesforce. ChatGPT allows us to create more interactive forms for users and businesses can receive more cleaner data.
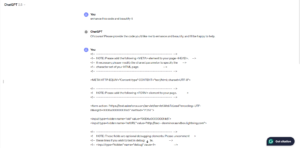
After editing and beautification, we received the below-mentioned code with improved indentation and CSS elements like animation slideIn that will animate the form when it appears on the page. The form will slide in from the top and fade in gradually. You can add much more to the chatGPT instructions and receive codes accordingly.
Also Read – How to manage Experience cloud site access in Salesforce
FAQs
1. Why use Web-to-lead in Salesforce?
If your business is looking to generate leads from the website, Web-to-lead forms allow us to generate leads from website traffic and collect information about them.
2. How do I generate leads from a website in Salesforce?
One can generate leads from their website using the web-to-lead feature in Salesforce. It allows you to create a form in which users can fill up their information according to the fields you choose.
3. What is the limit of web-to-lead?
We can generate up to 500 leads every day through web-to-lead. This means the minute you hit the 500 figure you have to manually enter leads because the limit is only 500 leads in 24 hours.
Conclusion
Lead generation is an important pillar to grow presence in the market and business as well at the same time. Web-to-lead forms come to the rescue in this matter as they help to gather leads from websites and digital platforms. Features like reCAPTCHA, even ensure that we won’t be getting repetitive or spam lead records which might waste our time and effort.


