The data table component in Salesforce Flow allows users to configure and display data in a table. It is the part of Screen flow type of Flow in Salesforce.
You can configure the Datatable component in Salesforce Flow to show specific fields from the object’s records and you can also specify sorting and filtering criteria to control which records are displayed.
The selected records can even be passed to other screen flow elements for further processing.
In this blog, we are going to create a Screen Flow which displays all the related Contacts of an Account record.
Using Datatable we will update a custom field named “Primary” on the Contact record.
Let’s see how to implement the Datatable component in Salesforce Flow:
As the data table is a part of the screen element, we will be creating a Screen Flow.
Accessing Flow Builder is now made easier with a simple click.
Want to Learn Salesforce Flows? Checkout our Salesforce Flow Course
Head to the home page of your Salesforce org and effortlessly reach Flow Builder by selecting the “Create” dropdown button.
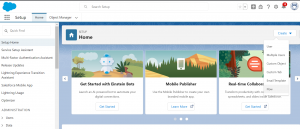
In the Flow Builder Canvas, drag the Screen component and Select Data table from the components list.

As you can see in the above image, to populate data in the data table, we need to enter a record collection.
In Salesforce Flow, a record collection is a variable that can store multiple records of a specific object type. It enables you to handle a group or set of records together in a flow.
Record collections prove helpful when you want to perform bulk operations or work with multiple records at once.
Check this out – The Complete Salesforce Flow Course
In this blog post, we will create a screen flow that displays all the related contacts of an Account.
This screen flow will be placed on the Account record’s detail page.
we are going to create a custom field called Primary on the Contact object and update it using the screen flow.
The primary field will be of checkbox datatype. By default, the checkbox will be unchecked on the record.
We will use the get record elements to fetch the related Contact records and store them in the record collection variable.
Get Record Element

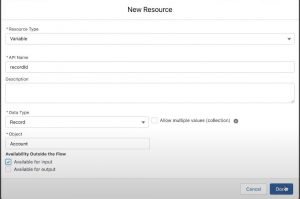
To place this flow on the Account record’s detail page, we need to create a resource variable to pass the particular records into Flow.

Whenever you create a new resource, make sure to make it available for input or output in Salesforce Flow.
To learn more about the Get record element in Salesforce Flow, click here
Screen element with the data table component
Now add the screen element below get the record element and drag the data table component to the screen element.
If the “Use Label as the table title” checkbox is checked then the data table you created will have the same title as your data table component label.
In the configure data source section we will pass the record collection variable which we created in the Get record element.

Under the source collection field, we have a Row Selection Mode which allows us to categorize record access for the user.
- Single – The user can select a single record from the data table.
- Multiple – The user can select multiple records from the data table.
- View only – The user can only view the records and cannot select them.
For this blog, we are going forward with the multiple-row selection mode.
Once you select multiple row selection mode there is an option to declare the minimum and maximum row selection limits.
If we go beyond the maximum row selection limit or select less no. of records as mentioned in the minimum row selection limit the datatable will throw an error.
Configure column section allows you to select the columns you want to display on the data table.
It is important to note that if you don’t provide any column, the data will not be visible on the data table.
Set component visibility gives you the ability to make the data table visible based on certain conditions.
Click on Done and save the newly created Flow. We should always debug the Flow before activating it.
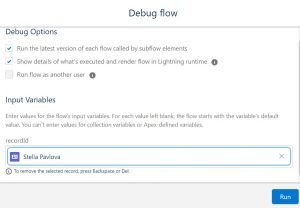
We will provide an Account Id as input for debugging and related Contact records will be visible as output in the form of a table.

Update Record Element
Now use the Update record element to update the Primary field on the Contact records visible in the data table.
To learn more about the Update record element in Salesforce Flow, click here
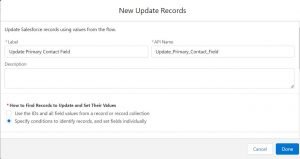
We will find the Contact records to update by specifying conditions to identify records, and set fields individually.

Set the Primary field value on the Contact record to True

Save the Update record element.
Now add another screen element to display a message at the end of the record update.

Activate the Flow and add it on the Account records detail page.
Navigate to any of the Account object records and from the gear icon click on the edit page

Drag the Flow components to the Account record detail page and select your Flow name.
Save the page and navigate back to any Account object’s record. You will now be able to see the data table component on the record detail page.

We will select the first Contact from the data table to make it the Primary contact and click on Next
You can see the Contact has been successfully updated as Primary Contact.

Advantages of using the data table component
- The data table component enables users to easily view and interact with information by presenting data in a tabular format.
- The data table component allows users to sort and filter data based on specific criteria. This functionality makes it easier to find relevant information.
- The standard Salesforce Data Table component does not have built-in pagination but we can add it using pagination events.
To learn more about data table in Salesforce Flow, check this out

How can we sort out the data-table using any specific columns.