

Summer 24′ introduces a new feature called Action Buttons for screen flows. These buttons make screen flows more user-friendly by letting you add features without switching screens.
It works here: add an Action Button to your screen flow. When someone clicks the button, it performs an action, like getting record details or making calculations. This means users can do everything they need in one place, making things quicker and easier.
This blog will guide you through obtaining Opportunity records using an Auto-Launched Flow. Next, it will demonstrate how to display Opportunity records associated with specific accounts using a Screen Flow and Action Button.
Get Opportunity Records Using Auto-Launched Flow
First, navigate to the Setup menu in Salesforce and search for Flows in the Quick Find box. Create a new Auto-Launched flow.
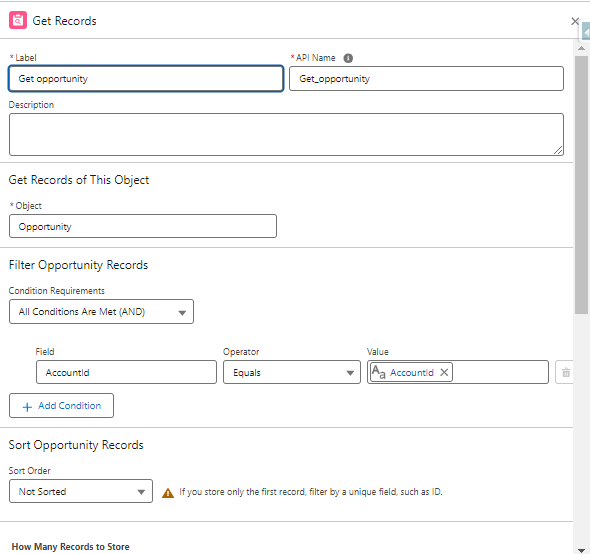
Now, add the “Get Records” element to your flow. Select “Opportunity” from the object list and define the filter conditions to specify which records to retrieve.
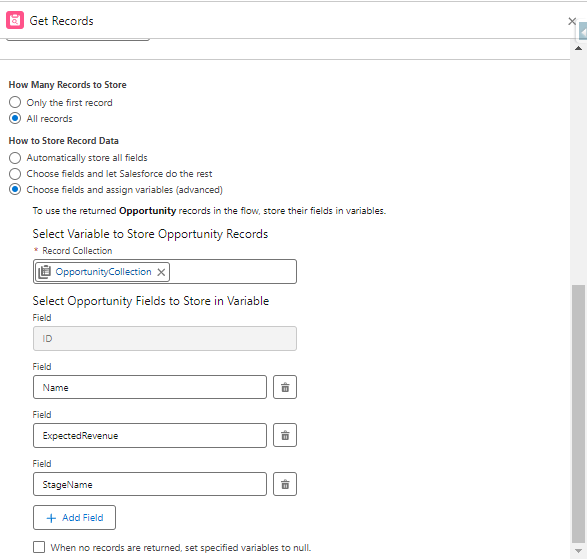
Fetch all records. Store the Opportunity records in a Collection variable. Decide whether to store all fields or only specific fields of the retrieved records, typically choosing specific fields to reduce processing time.
Save and Activate the Flow.

Also read: How to Upload a File to a Record with Salesforce Flow
Create Screen Flow to show Opportunity Records.
This screen will contain a data table and an action button. Once the button is clicked, all opportunities from the selected account will be displayed in the data table.
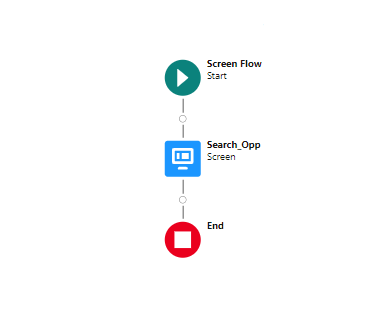
Select Flows under Process Automation from Salesforce Setup and click New Flow. Choose Screen Flow and click Next.
Configure Screen Element:
Add the Screen element onto the canvas and name the screen.
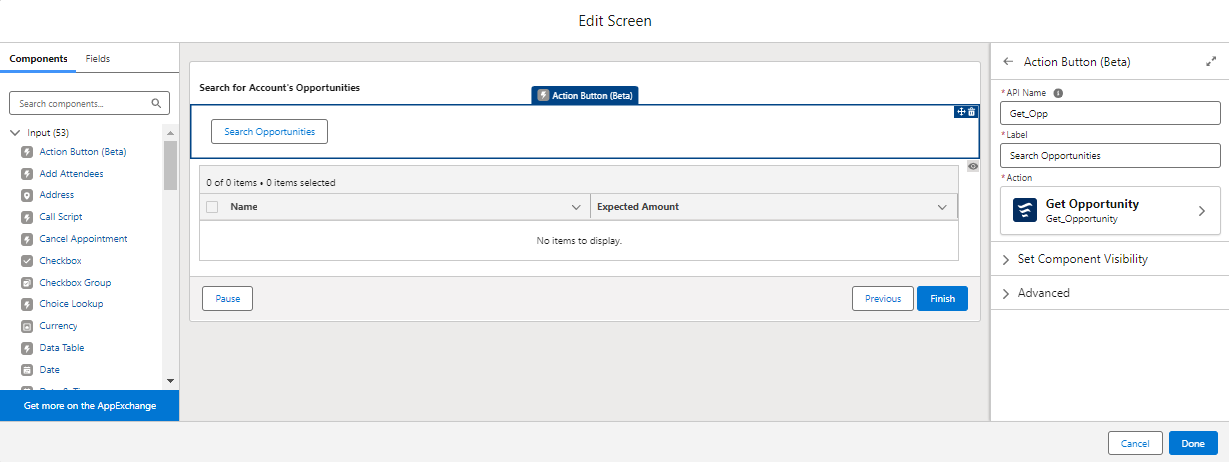
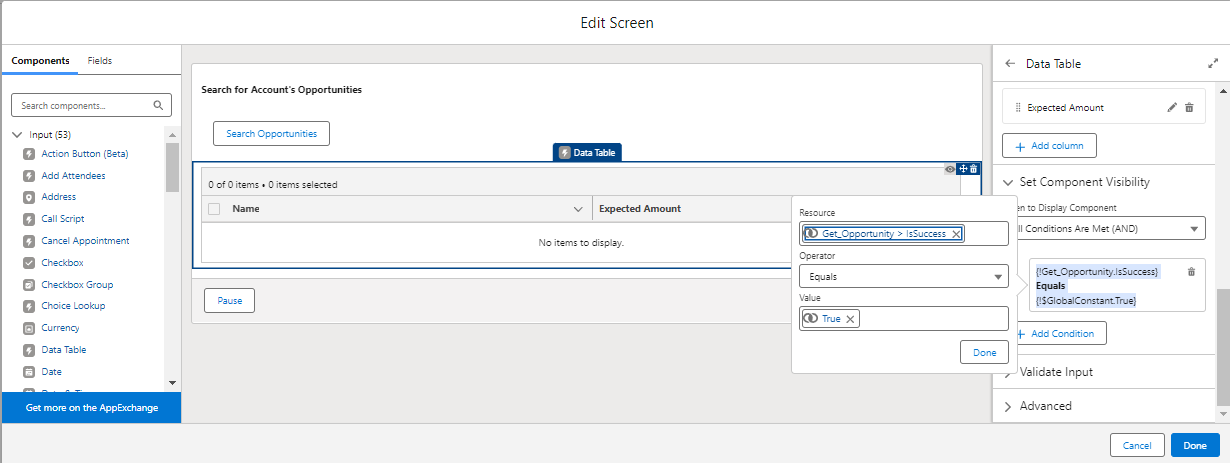
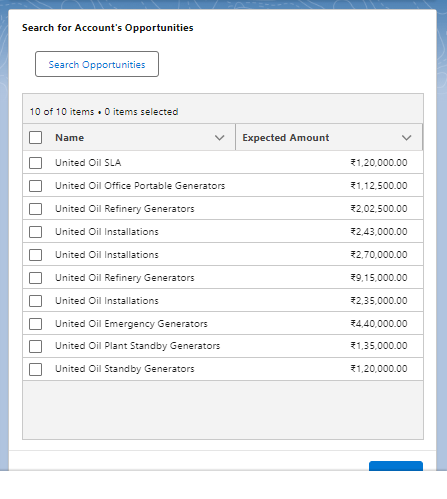
Drag and drop the Display Text Element to the screen to show “Search for Account’s Opportunities” on the screen.
Add an Action Button labeled “Search Opportunities.” In Action, select the flow we created to fetch the opportunity records.
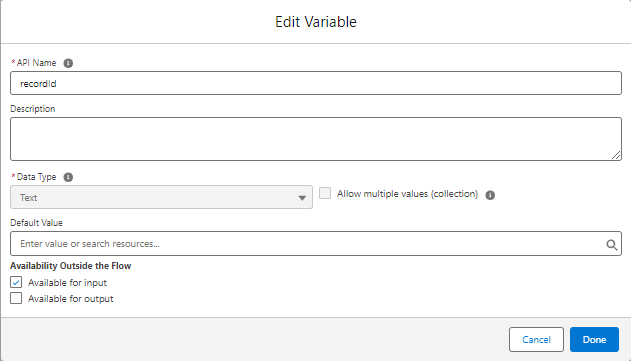
Create a variable to store the Account ID.

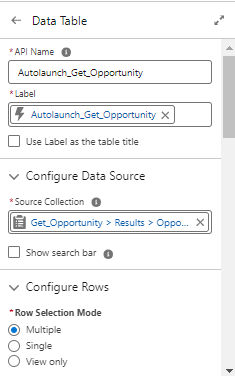
Add a Data Table component and configure it to show Opportunities.
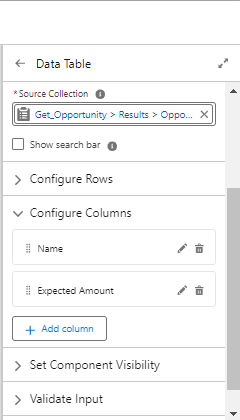
Select the source as {!Get_Opportunity.Results.OpportunityCollection}. We want to display all the Opportunity records so that Configure Rows are kept as Multiple. Select the fields you want to display in the Configure Column Section.
The Opportunity is displayed only when we click on the Search Opportunities button, so set the Component Visibility as: {!Get_Opportunity.IsSuccess} Equals {!$GlobalConstant.True}
Click “Save,” provide a name and description, and then click “Save.” Once saved, click “Activate” to make the flow available for execution.
Want to Learn Salesforce Flows? Checkout our Salesforce Flow Course
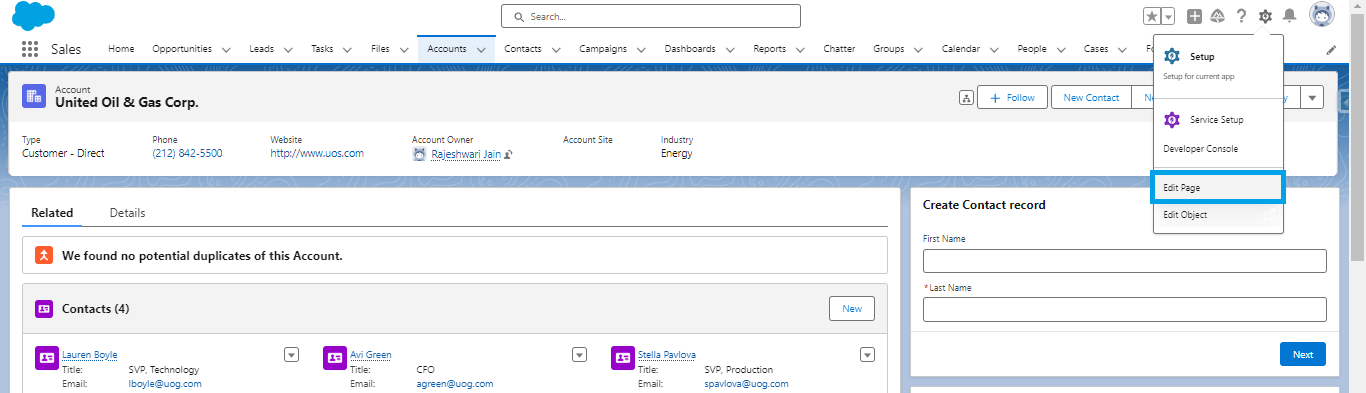
Add Flow to Record Page:
Once your flow is ready, navigate to the record page you want to modify. Open an Account record, click the gear icon, and select Edit Page to enter the Lightning App Builder.
In the builder, locate the Flow component in the left sidebar and drag it to the desired section of the page layout. Select your flow from the Flow drop-down list in the properties pane and configure Record Id.
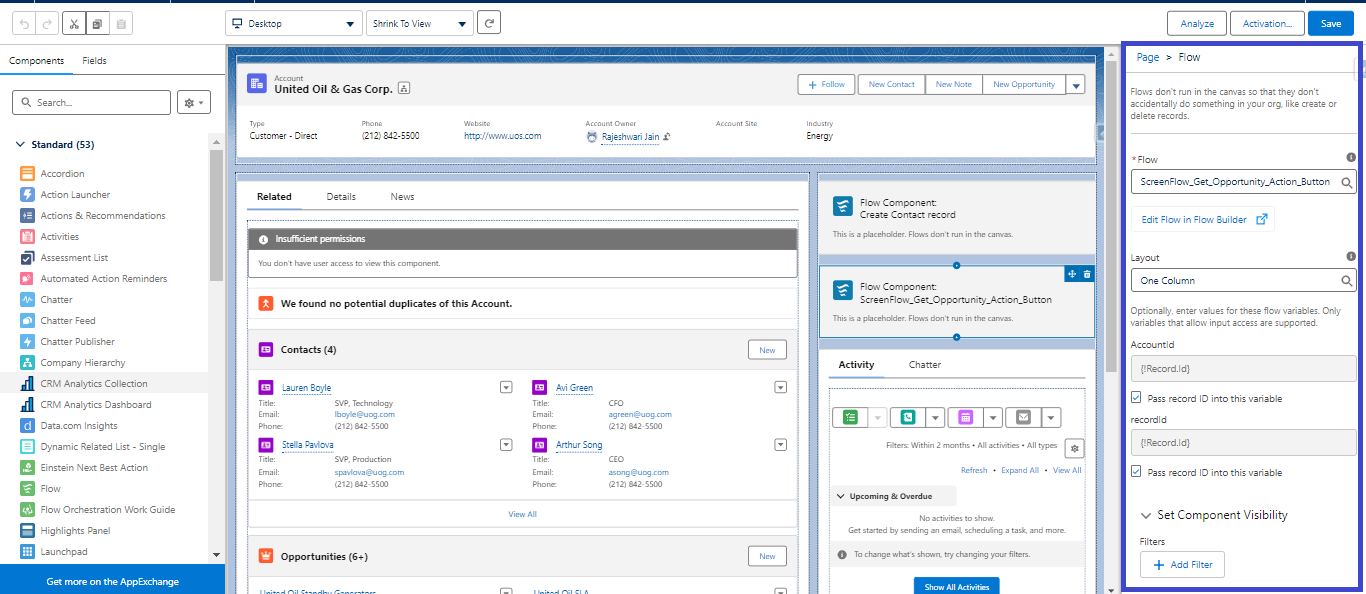
After placing and configuring the flow component, save your changes in the Lightning App Builder. To make the flow visible to users, click Activate and choose the appropriate activation settings, such as making it the default for all users, a specific app, or specific profiles.
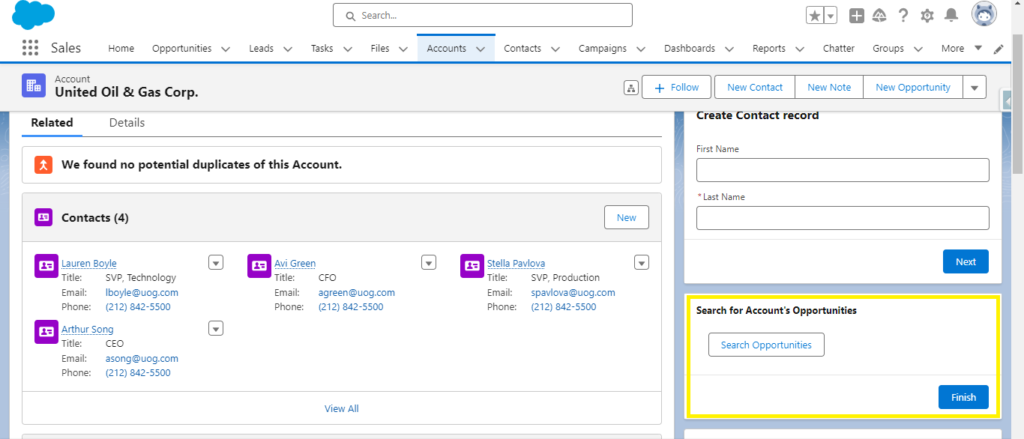
This is how the flow appears on the Accounts Record Page.
FAQs
1. What are Flow Action Buttons in Salesforce?
Flow Action Buttons allow users to trigger auto-launched flows directly from a flow screen. This feature enhances user interaction and workflow efficiency.
2. Do Flow Action Buttons support conditional visibility?
Yes, you can set conditional visibility for Flow Action Buttons based on field values or formula logic. This allows you to control when the button is displayed to the user.
3. Can we run multiple auto-launched flows using Flow Action Buttons from a single Screen Flow?
Yes, you can include multiple Flow Action Buttons on a single Screen Flow, triggering a different auto-launched flow as needed.
Conclusion
The Action Button component, introduced in the Summer ’24 release, is a significant upgrade for Salesforce. This feature lets users start auto-launched flows directly from flow screens, opening up many new possibilities. Users can easily access important data with just one click, enhancing both efficiency and visibility in Salesforce.


