

What is the Salesforce CPQ Package?
Salesforce offers a package called Salesforce CPQ (Configure, Price, Quote) that assists companies in automating and streamlining their quotation process. Businesses that deal with complicated and configurable goods and services, where price and configuration can change depending on a variety of circumstances, will find great value in CPQ solutions.
In this blog, let’s explore more about how to install Salesforce CPQ.
Guidelines for Installing Salesforce CPQ
Salesforce CPQ & Salesforce Billing are the packages that can be installed in the Salesforce platform using the installation links mentioned below. Upgrades for Salesforce CPQPackage and Salesforce Billing Package have the same process to install the upgraded version.
Before proceeding with the installation steps for how to Install the Salesforce CPQ Package here are some pre-requisite to perform:
Pre-Requisite Steps:
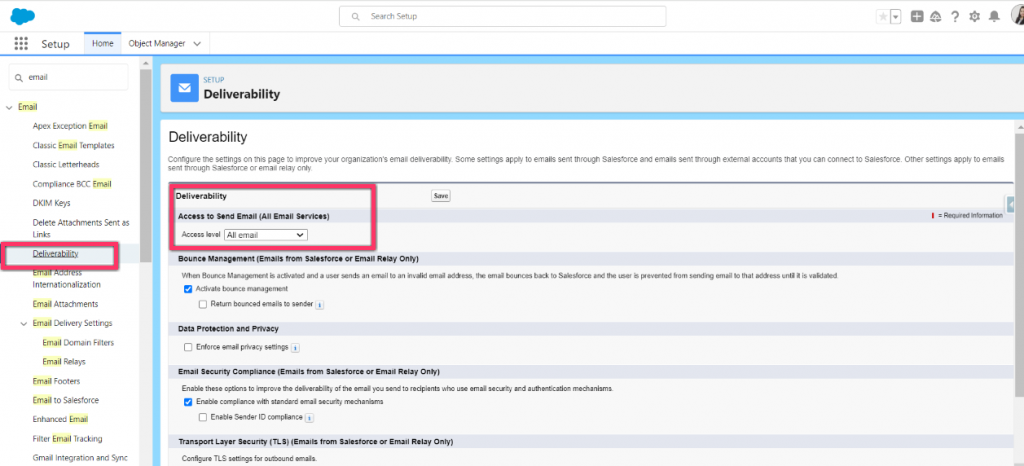
1. Make sure Email Deliverability is set to All Emails
Setup >> Search Email >> Click Deliverability >> Select All Email and Click Save.
2. Enable Chatter: Navigate to Setup >> Search Chatter Setting >> Edit and Select the Enable Checkbox and Save

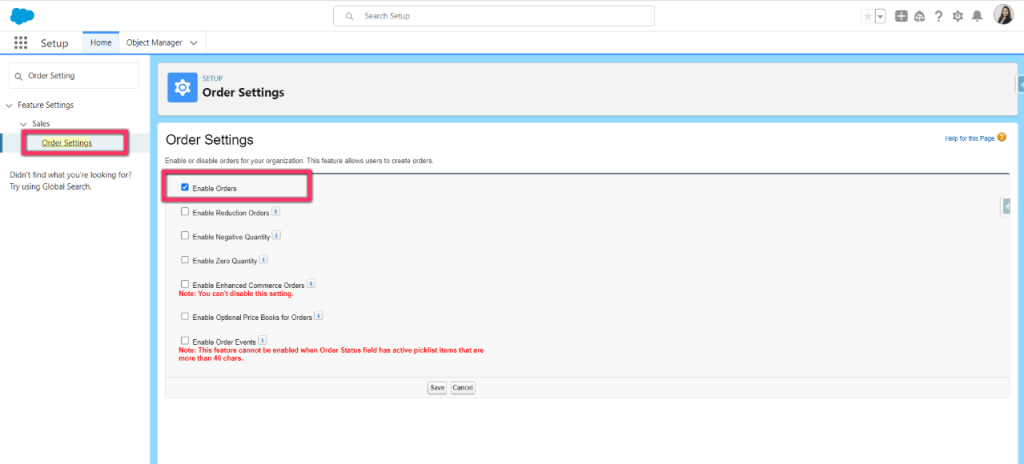
3. Enable Order: Navigate to Setup >> Search Order Setting >> Select the checkbox of Enable Order setting and Click Save.
4. Enable CRM Content: Navigate to Setup >> Search Salesforce CRM Content >> Select the checkbox of Salesforce CRM Content and Click Save.

Here We have completed the pre-requisite steps, Let’s proceed with the Installation steps for the Salesforce CPQ Package.
Step-by-Step Installation Steps:
1. Make sure you have a single org open before installing the CPQ package.
2. Go to Salesforce CPQ Package Installation Links, As you can see Different package links are available, Navigate to the Salesforce CPQ section.
 3. If you are installing in Sandbox, Sandbox will be selected. If installed in Production, Production would be selected.
4. After clicking the respective link, it will redirect you to the Login screen. Enter the respective Credentials.
5. Install Package screen will be displayed. It shows three options:
- Install for Admin Only: This setting enables the Administrator profile or any profile with “Custom Profile” Permission.
- Install for All Users: By selecting this option, this setting will apply to all internal custom profiles.
- Install for Specific Profiles: It allows to you determine package access for all custom profiles in the org, we can decide which profile should have full access and which profile should not have access.
6. Select the option Install for All Admins Only, select the acknowledgement checkbox, and Click Install.

Want to Learn Salesforce Flows? Checkout our Salesforce Flow Course
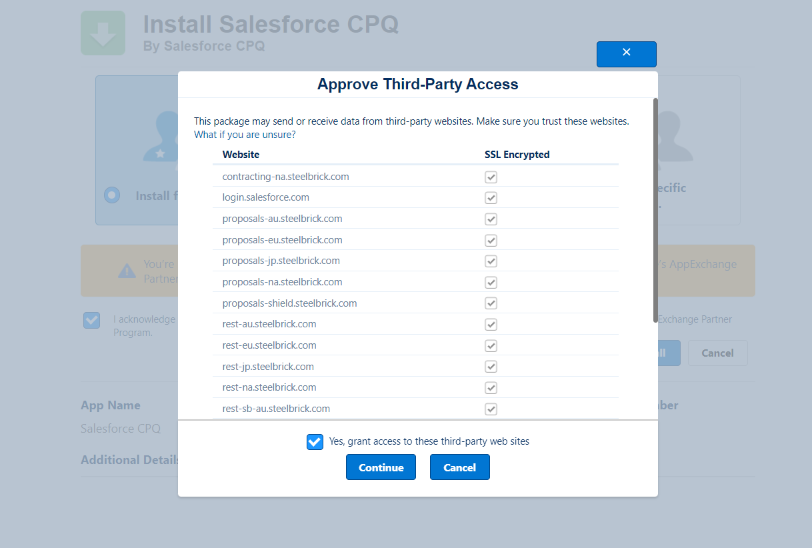
7. After clicking on Install Action, an Approve third-party access pop-up appears. Select the grant access to third-party website checkbox and Click Continue.
8. After Clicking Continue, it shows Installation is in Progress.

Once Installation is completed, it sends out an email for confirmation Package successfully installed.
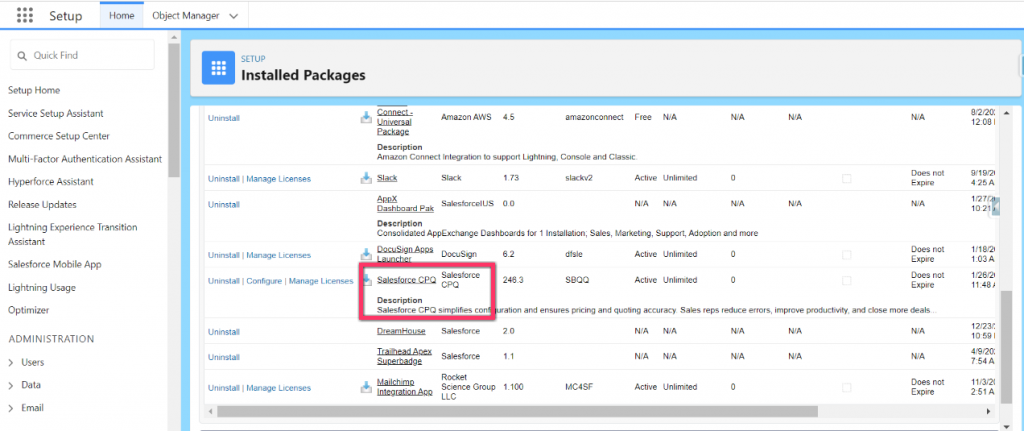
9. To verify the package is installed in org, navigate to Setup << Installed Package, observe Salesforce CPQ package is available under Installed Packages.
Post Installation Steps:
So now we have installed the package, here are some post Installation steps that we need to follow:
1. If the package includes a permission set, assign it to respective users as per requirement. You cannot edit the permission set because the upgrade occurs in the same package.
If you clone the permission set, you can edit the permission set, but future upgrades won’t happen in the same cloned permission set.
2. When reinstalling a package, if you need to use the export file you got after uninstalling to reimport the package data, refer Import Package Data
3. To assign licenses to users, Click Manage Licenses under Installed Packages. Assigning Licenses can’t be done in Lightning experience, required to switch to Salesforce Classic.
FAQs
1. How can I troubleshoot if I encounter issues during installation?
Consult the Salesforce CPQ documentation for assistance with issues. For help, you can also check the Salesforce community forums or contact Salesforce support.
2. Can I configure the components package?
Yes, you can configure the component of the package as required. For more check out: Configuring Installed Packages
3. Is it possible to uninstall the Salesforce CPQ package if needed?
Yes, Salesforce allows package uninstallation. However, it’s crucial to carefully review the consequences and backup data before initiating the uninstallation process.
Conclusion:
This blog offers a comprehensive and user-friendly guide, ensuring users can successfully install the Salesforce CPQ package while addressing key considerations and post-installation steps for seamless integration into their Salesforce environment.


