


Do you often repeat steps when creating a Salesforce Flow and find it challenging to manage, especially when making changes? Subflows can simplify this process.
What are Subflows?
Think of subflows as small building blocks for your Salesforce Flows. You create them once and use them in other flows as often as you want.
Here’s why sub-flows are best:
- No repetitive work: Build your subflow once and use it wherever you need. This saves you time and effort during the initial flow creation process.
- Easy Updates: Need to make changes? Update the Subflow, and the changes will automatically appear in all the flows that use it. There is no need to search through every single flow for edits.
- Keep Things Organized: Subflows assist in breaking down complex flows into smaller, more understandable segments, making your flows tidier and easier to manage.
Business Scenario:
Create a screen flow enabling users to create contacts, with sub-flows displaying error messages for missing input.
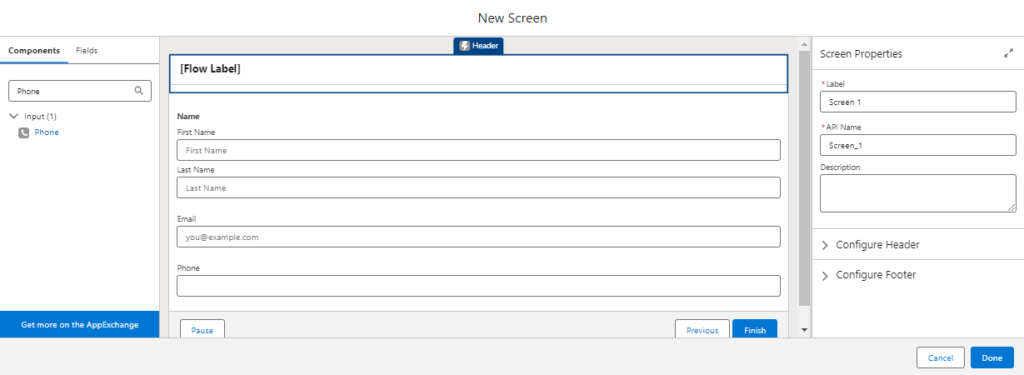
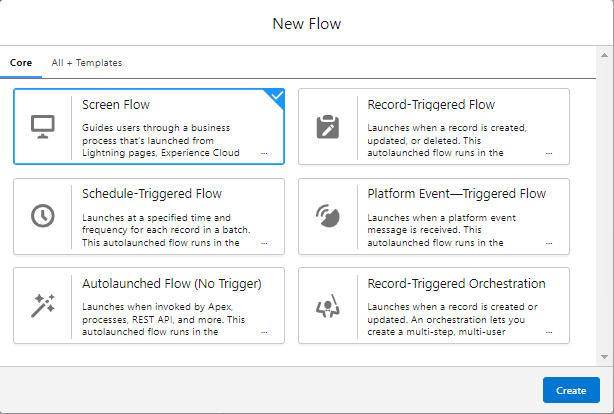
Create a Screen flow to capture user input for Contact records:
Open the Flow Builder and select Screen Flow to create a new flow.
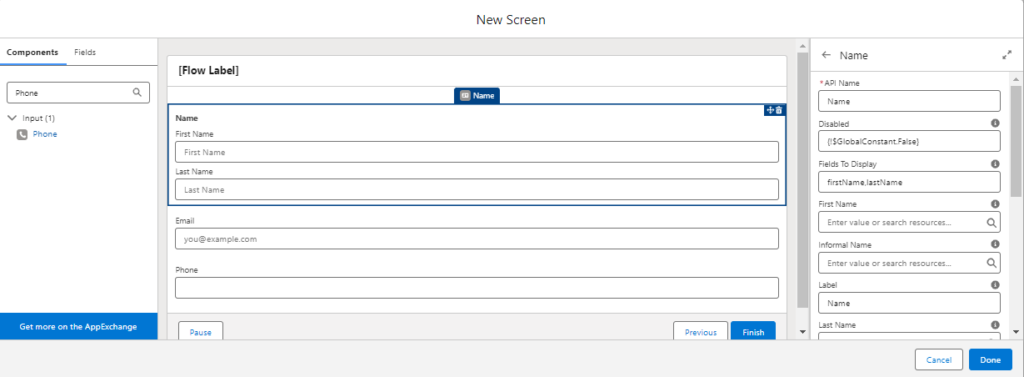
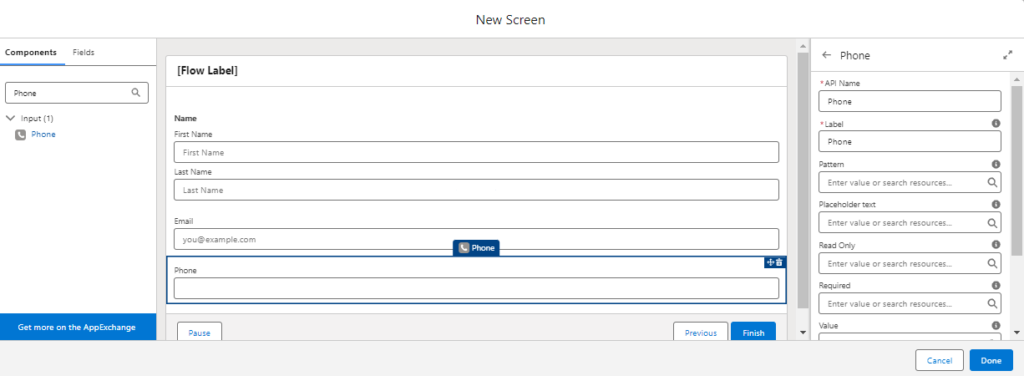
Drag and drop the components to collect the user’s Name, Email address, and phone number.

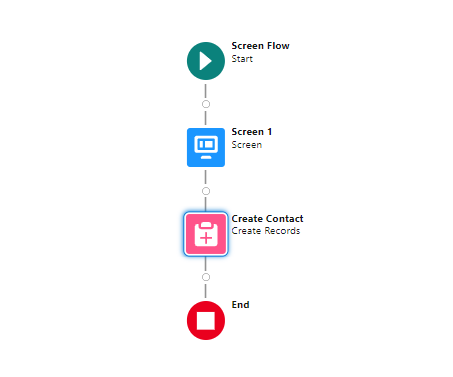
Use a Create Record element to create a contact record:
Add a “Create Records” element to the flow. We will create a single record and set the record fields to “Use separate resources and literal values.” Select object type as Contact and map specific user input fields to corresponding contact fields.
FirstName as {!Name.firstName}
LastName as {!Name.lastName}
Email as {!Email.value}
Phone as {!Phone.value}

After entering all the details, save the flow as “Create Contact by user input”.

Also Read – Repeater Component in Salesforce Flows
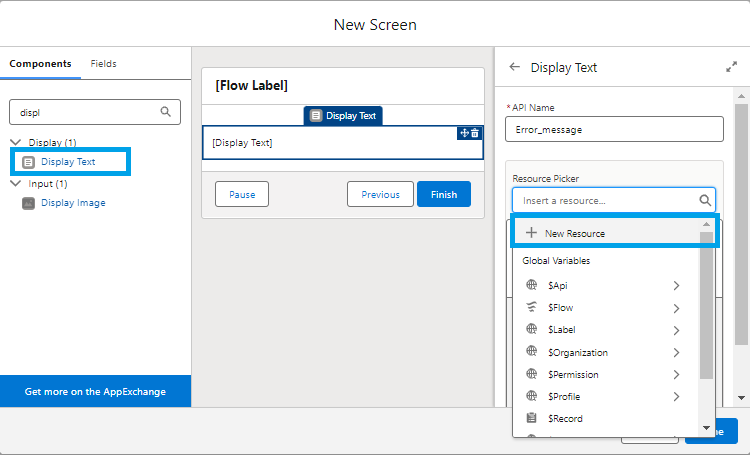
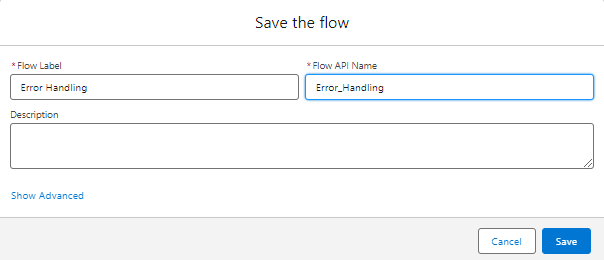
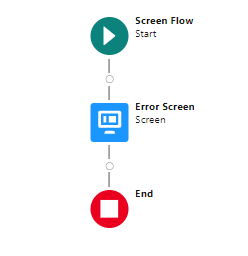
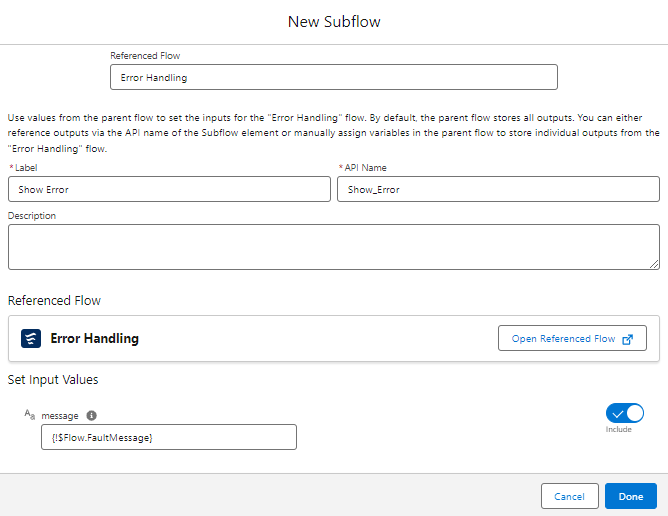
Create a Screen Subflow for Error Handling
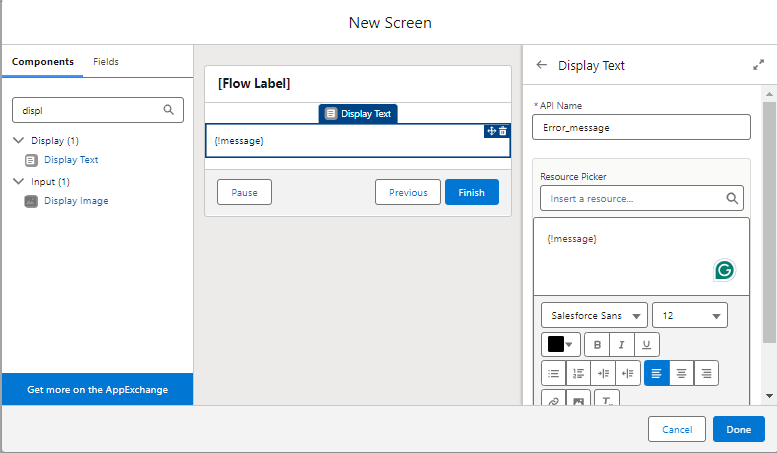
In the Error screen, add the “Display Text” component. This component will show the dynamic error message passed from the main flow.
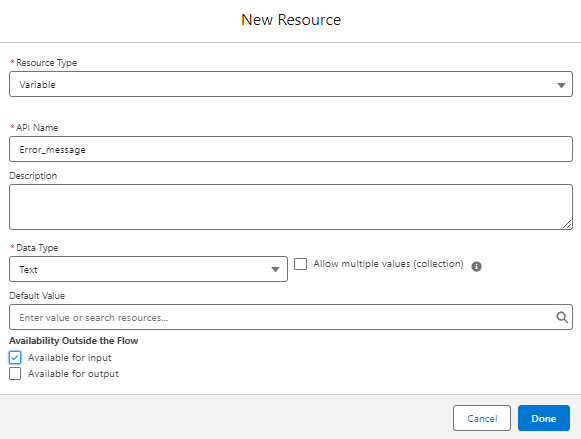
Use Insert new Resource to create a new resource of type Variable with the API Name “Message” and data type as Text.
Mark this variable as “Available for Input” to allow the sub-flow to accept the value from the main flow.
Click on “Done” to save the flow as “Error Handling” and activate it to make it available for use in the parent flow.
Want to Learn Salesforce Flows? Checkout our Salesforce Flow Course
Use Sub-flow in main Flow:
Adding a Default Path
In the main flow, add a Default Path after the Create Records element to handle any errors encountered during record creation.
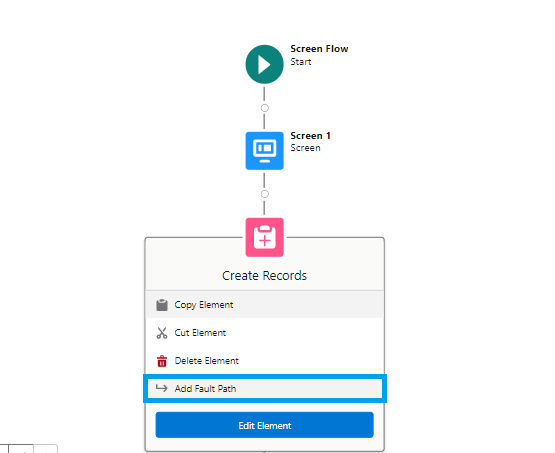
In the Default Path, add a Subflow element.
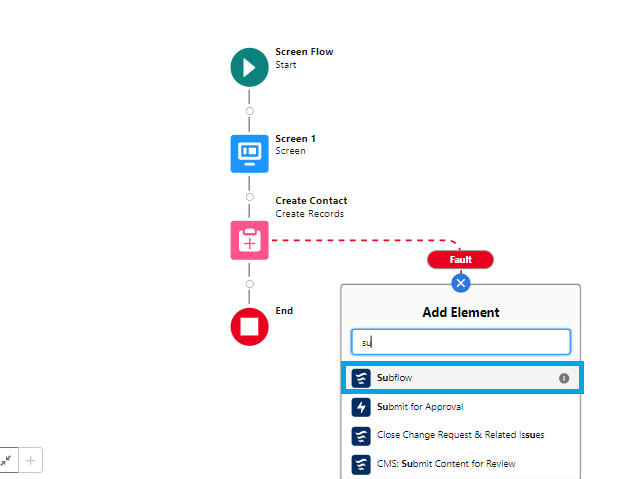
Select the Error Handling subflow in the Referenced Flow. Label the subflow action as Show Error. Set the Input value as {!$Flow.FaultMessage} and click on Done.
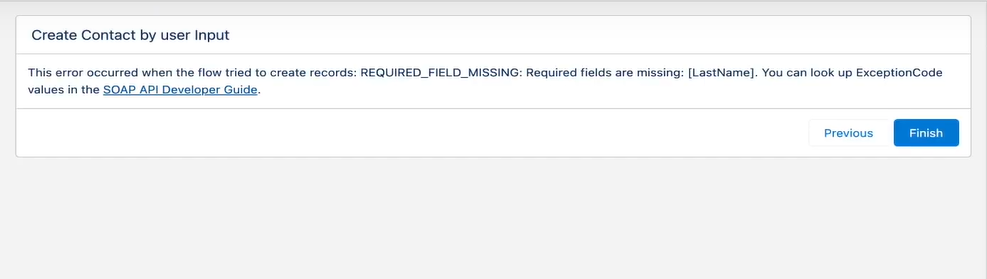
Save and Debug the flow to see the results.
 Enter the details without Last Name and click on Next. Hence we can display the error message based on input to the user.
FAQs
1. Why do we use Subflow in Salesforce?
Subflows help you reuse logic and make complex flows easier to manage. They do this by grouping common tasks into smaller, independent pieces.
2. What is used to pass data between a flow and a Subflow?
Input Values: Select values to pass into the subflow.
Output Values: Select values to return to the parent flow.
Input & Output Values: Select values to pass and return between the flows.
3. How do I create a Subflow?
You can create a subflow using the Flow Builder in Salesforce. It’s similar to creating a regular flow but with the option to mark variables as “Available for Input.”
4. Can we use Subflows within other Subflows?
Yes, you can create nested subflows. This allows for building even more complex automation processes with modular components.
5. What happens to Subflows when we deactivate a Flow?
Deactivating a flow doesn’t automatically deactivate the subflows it uses. Subflows remain active and can be used by other flows. However, if a Subflow isn’t used in any active flows, it’s recommended that it be deactivated.
Conclusion
Subflows offer a powerful method to simplify your Salesforce automation processes. Their primary benefit lies in their reusability. By developing a Subflow for a frequently performed task, you can incorporate it into various flows, thereby conserving time and effort.
Furthermore, subflows help in organizing flows by dividing them into smaller, more manageable segments.


