In this blog, we will explore the various ways of error handling in salesforce flows which encounter by User.
What is Error Handling in Salesforce Flow
Error handling in Salesforce Flow involves solving issues that arise during the execution of your flow. These issues can be happen from various sources which includes Validation errors caused by incorrect data formats or missing required values, missing essential fields that have not been filled in, permission issues like insufficient user access to perform actions, and other unexpected errors such as system limitations or integration issues impacting flow execution.
For example, errors can occur if a user assigns a value to a field that doesn’t match its data type, like entering an incorrect record ID into a lookup field. Additionally, errors may arise from actions like attempting to delete records that don’t meet the requirements.
How can we handle errors in Salesforce Flow?
We can handle errors in Salesforce flows in the following ways:
- Create a case using a fault connector
- Send an email using the fault connector.
- Display error message using fault connector, and
- Apex classes with Try and Catch blocks
We are going to implement an error-handling solution using Fault Connectors.
Scenario 1 –
Suppose we’re creating a Contact through a screen flow. Due to a Validation rule, the Contact creation fails with a message – “Contact has not been created”. In this situation, a Case should automatically be generated and assigned to either the IT department or a manager
Flow Set-up:
- Create a screen flow, define the screen properties, and add a Text component for capturing Contact details. (Last Name, First Name, Phone, Email).
Create Contact:
- Add a “Create Record” element to the flow for the Contact object and Set Field Values for the Contact.
Error Handling: Create a Case using a fault connector
We can create a case for your IT department with the error details, assign a case number to be stored in a Text variable, and display that case number to the user on the Screen
- Create a “Fault Path” from the “Create Record” element. This path activates if the contact creation fails.
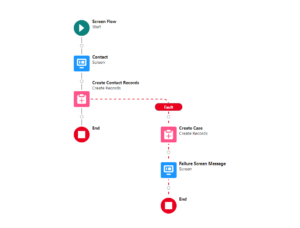
- Provide label – Create Case and API name – Create_Case.
- Select Case object.
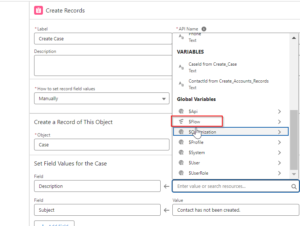
- Set Field Values for the Case – Field (Description) Values ( {!$Flow.FaultMessage}).
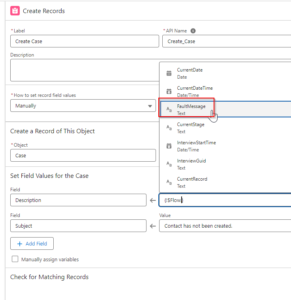
- Set the field values for the case to “Contact has not been created” in the Subject field.
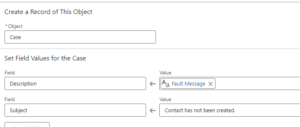
- Create a Screen element after the fault path.
- Add a “Display Text” component within the screen. and provide the API name – “Failure_Message”.
- Click on the inserted resource and write the failure message – Contact has not been created! we have created a case for you, our manager will contact you soon.
- Click on “Done”
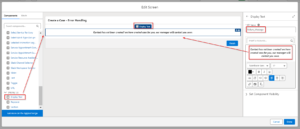
Test the flow
Configure the flow on the Contact record page and test it with sample data. Verify error handling with case creation and user message display work as expected.
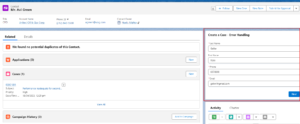
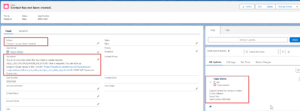
It is not saving and displaying an error message.
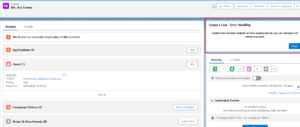
Now, check the record created in the Case object

Scenario 2 –
There is a custom field ‘AccountSources__c’ and the field’s Data type is ‘Picklist’. AccountSources__c picklist only contains three options – Email, Phone and Partner Referral.
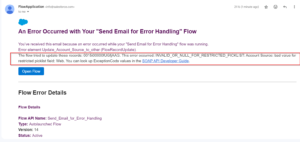
When you update an account, we want the Account Source to be automatically set to “Web”. However, “Web” isn’t currently an option in the picklist, so this will trigger an error and send an email notifying about the issue – “INVALID_OR_NULL_FOR_RESTRICTED_PICKLIST: Account Source: bad value for restricted picklist field: Web. ”
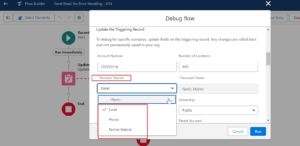
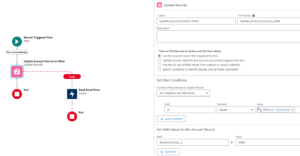
- Select “Update Record” and provide the API name (Update_Account_Source_to_other) and Label (Update Account Source to Other).
- In the Set Filter Conditions choose – All Conditions Are Met (AND).
- Map the field (Id) Operator (Equals) Value {!$Record.Id}.
- Set Field Values for the Account Record – Field (Account_Source__c) Value (Other).
Error Handling: Sending an Email using a fault connector
- Add a fault path within the “Update record” element.
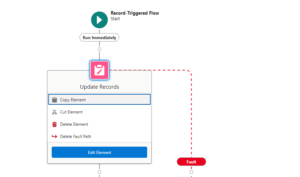
- Add an action by clicking on the plus symbol and searching for the Sending email.
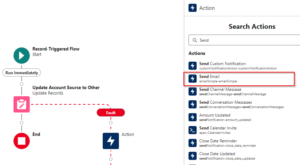
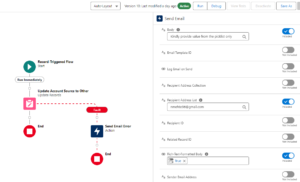
- Within the fault path, add an “Action” element and search for “Sending Email.” Configure the email details:
Subject: “Please Provide Value from Picklist”
Body: Use a clear message like “Kindly provide a value from the Account Source picklist only.”
Rich-Text-Formatted Body: {!$GlobalConstant.True}.
Recipient Address List: Specify the desired email address (e.g., “xxxxx@gmail.com”) to receive the notification.
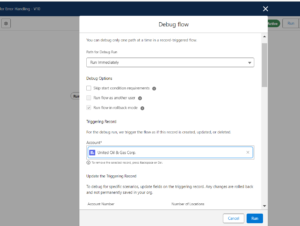
- Click on debug for test the flow and try to update the desired account.
- Check your designated email to confirm the error notification is sent.
Want to Learn Salesforce Flows? Checkout our Salesforce Flow Course
Scenario 3-
Suppose we are generating a lead, but an error occurs because a required field is missing.
Flow Setup:
- Create a screen flow, define the screen properties, and add components for capturing Lead details. (Full Name, Company and Status).
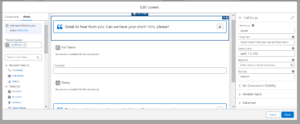
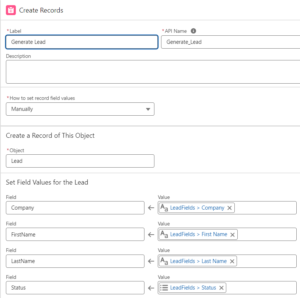
Create Records:
- Add a “Create Record” element to the flow for the Lead object and Set Field Values for the Lead.
Error Handling: Display an error message using Fault Connectors
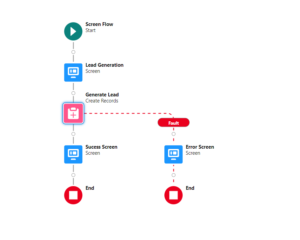
If you want to inform users about the error within the flow, add a Screen element following the fault path. for the success scenario as well as failure.
Display Error Message:
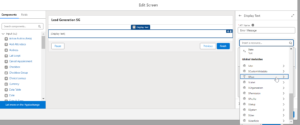
- Within the fault path, add a Screen element and configure the API name (Error_Screen) and Label(Error Screen).
- Drag “Display text” into the screen, Click on the ‘Insert Resource’. and select {!$Flow.FaultMessage}
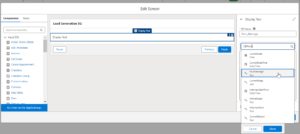
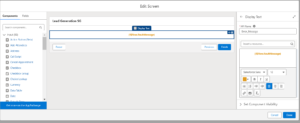
Display Success Message:
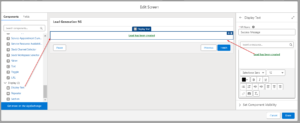
- Add a Screen element after creating a record (Generate Leads) and configure the API name and(Sucess_Screen) Label(Success Screen).
- Drag “Display text” onto the screen, click on ‘Insert Resource’, and type the personalized message – “Lead has been created.”
- Click on “Done”
Test the Success and Failure message
- Click on debug and fill in the required field to generate the lead.
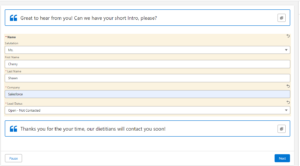
- After clicking on the Next, Success Message will be popup.

- Implement a Validation rule on the Lead object to prevent the creation of Leads –

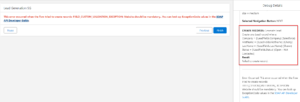
- Try to generate the lead again from the debug menu and click on Next; you will encounter an error message
Also, Learn about Insufficient access rights on cross-reference id in Salesforce Flow
FAQs
1. How can we throw errors or create custom error messages within Salesforce flows?
To throw errors within a flow, we can use the “Custom Error” element. In this scenario, you can define a specific error message and code within the flow itself, and you can also configure a Validation rule on a specific object within the flow,, allowing for the possibility of throwing an error exception.
2. What is the Fault Path in Salesforce Flow?
In Salesforce Flow, you use a fault path to actively manage errors and exceptions that may occur while the flow is running. It lets you set up what should happen when an error occurs, like showing an error message, logging details about the error, or sending the user to a different screen. This helps to handle unexpected issues during flow execution.
Conclusion
Salesforce flows can encounter errors during execution due to invalid data, missing fields, permission problems, or unexpected issues. To handle these errors, you can create cases, send error notification emails, or display informative messages to users.


