


Spring ’26 provided a native Kanban Board screen component for Screen Flows, bringing the familiar visual workflow of Kanban directly into declarative automation. This component makes it possible to show collections of records as cards inside a Flow screen, group them into columns based on a picklist (basically like Stage or Status), display summary totals per column and surface up to five fields on each card, all without building a custom Lightning component.
This addition helps turn guided processes into visually rich experiences for reviewers and approvers.
When to pick a Kanban Board inside a Flow?
The Kanban Board in a Screen Flow gives us in situations where visibility and quick decisions in situations, some of the following possible scenarios:
- Pipeline reviews: A compact view of Opportunities grouped by Stage, so a stakeholder can quickly get any issues or high-value deals, which generally helps the business to grow fast.
- Case Troubleshooting: Group Cases by Status or Priority to make decisions that help to provide immediate review and fix.
- Task backlog improvements: Visibility of tasks by Priority or Sprint so teams can rebalance workload before a planning meeting.
- Pre-approval checks: Present grouped records to a manager, have them confirm totals, then send to an approval step.
Above scenarios benefit from visual summaries (counts or currency totals per lane) and at a pace record details, making decisions faster and more confident.
How to add the Kanban Board to a Screen Flow?
This is a compact step that can be followed in any org where Spring ’26 features are enabled.
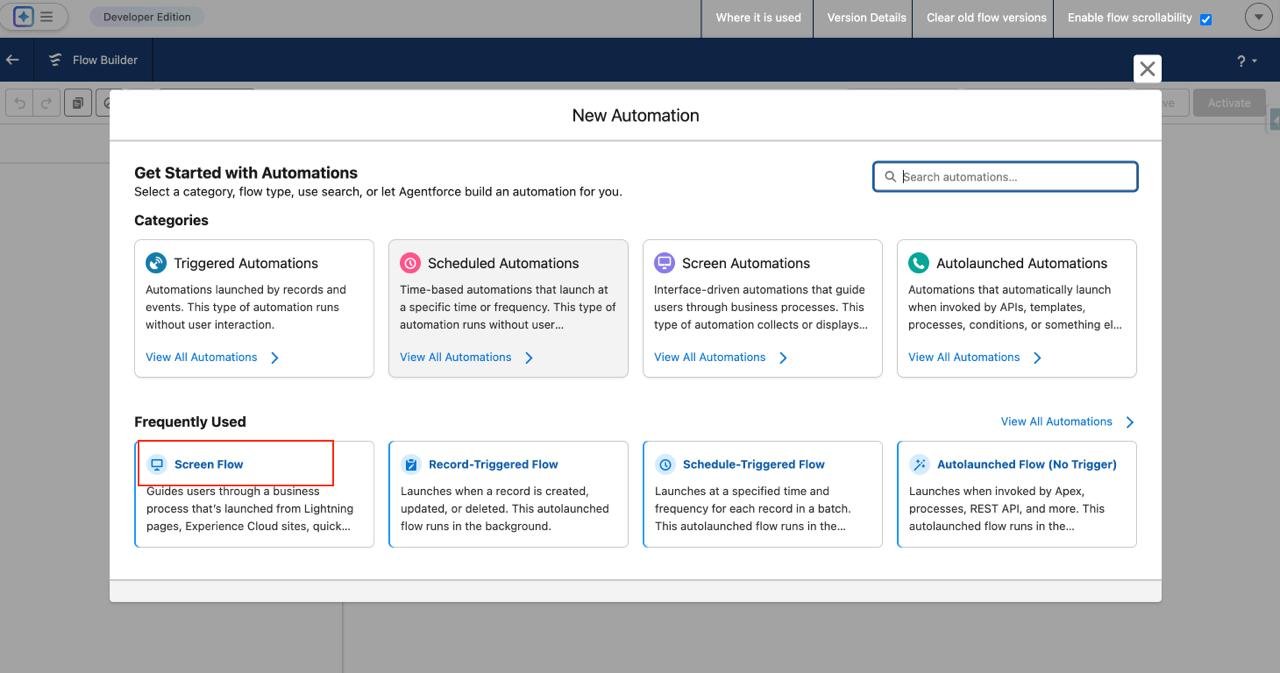
1. Create the Flow
In Flow Builder, select New Flow => choose Screen Flow => pick an Auto layout for a better experience.
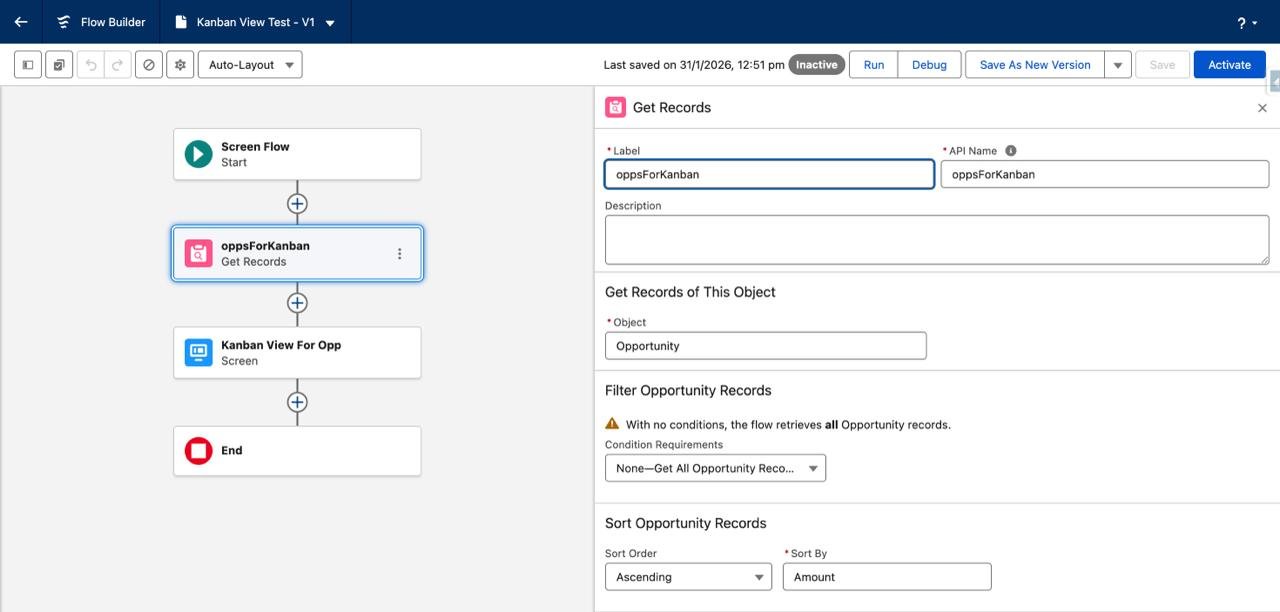
2. Get the records to show
Add a Get Records element to retrieve the collection (for example, Opportunity records filtered to the relevant pipeline or owner). Store all fields needed for card display. Name the returned collection clearly (for example, oppsForKanban).
3. Add a Screen element
Drag a Screen onto the canvas, then open it to configure.
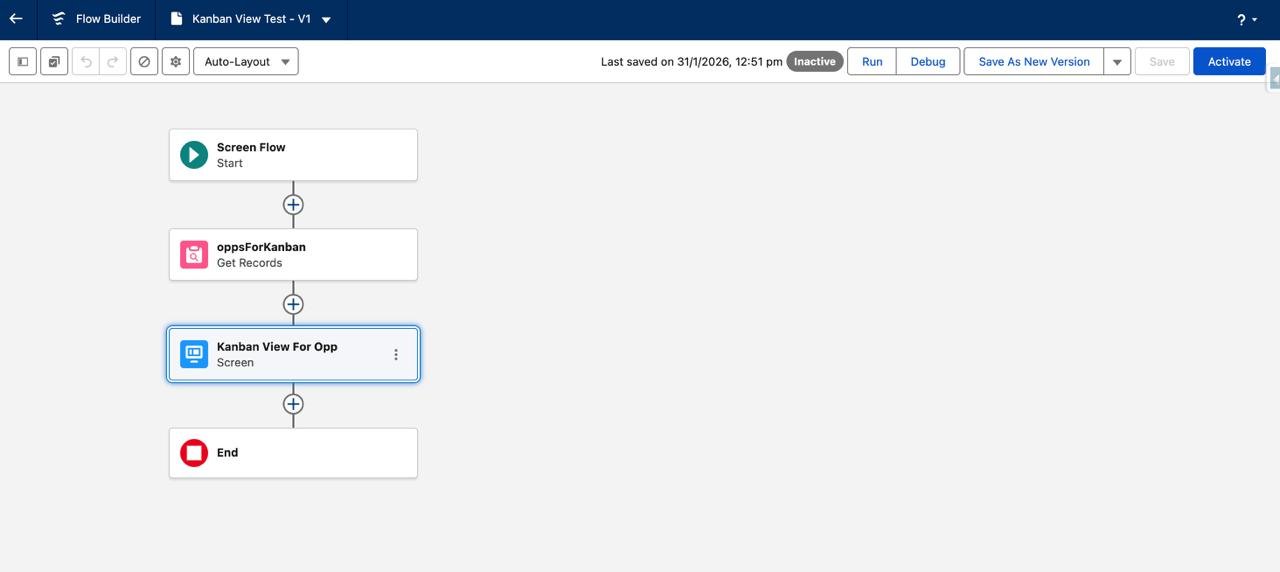
4. Place the Kanban Board component
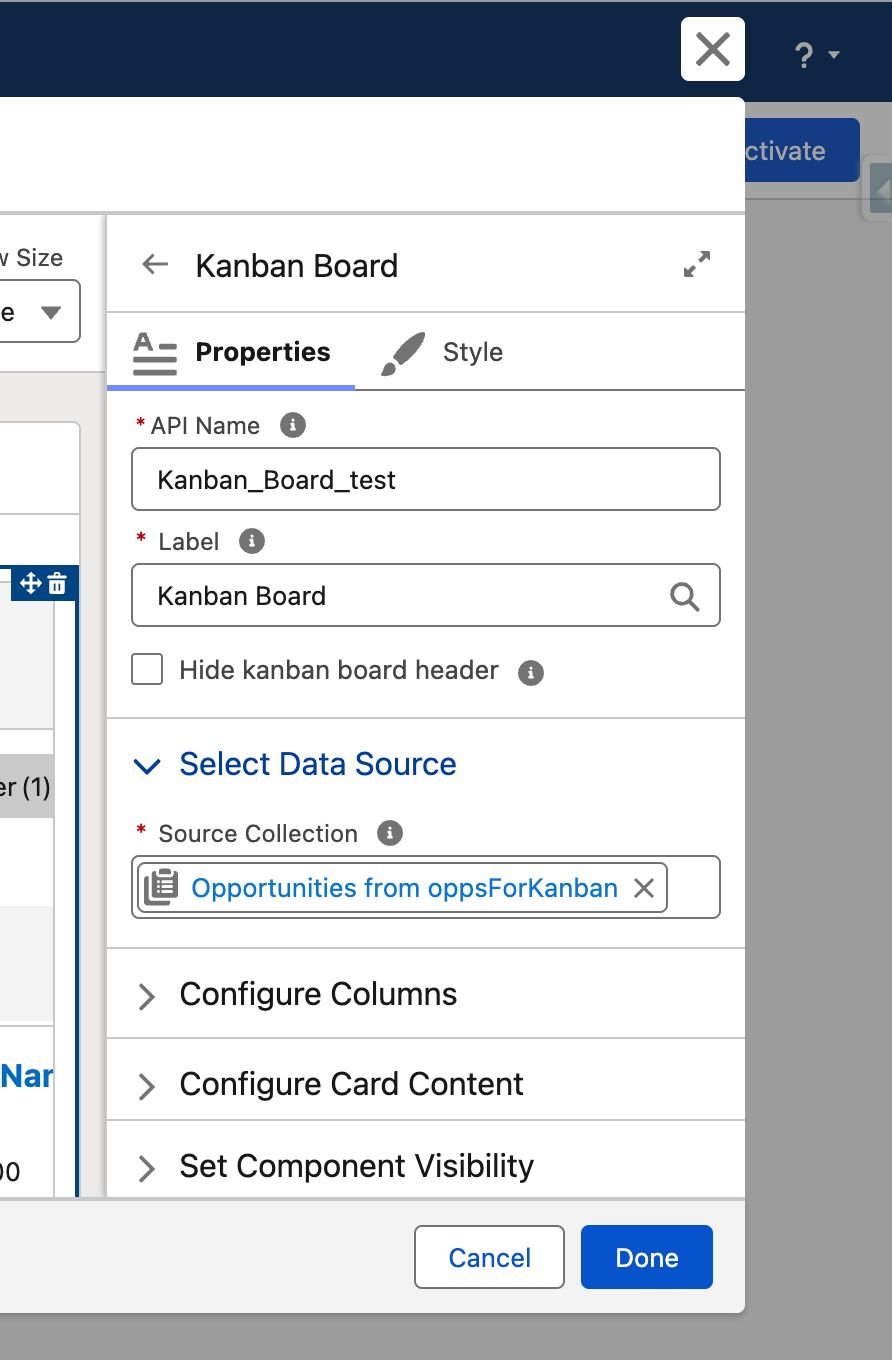
From the Screen components panel, find Kanban Board and add it to the screen layout. Give it a descriptive label and API name.
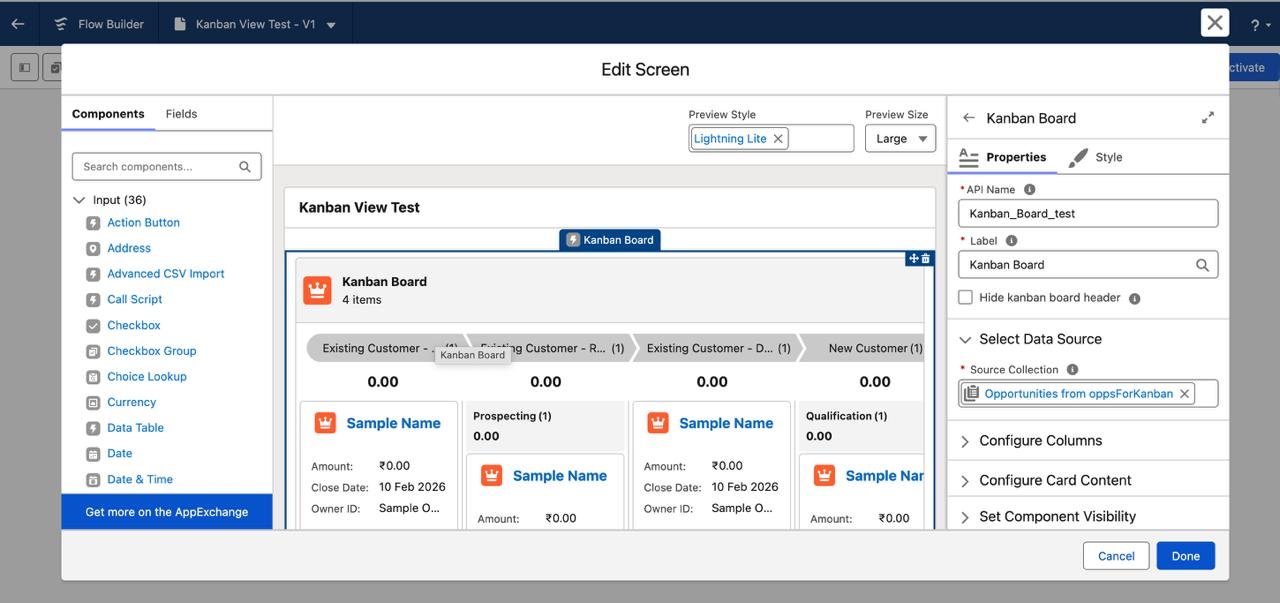
5. Select the Source Collection
In the component properties, point Source Collection to the collection returned by the Get Records element (oppsForKanban). Note: the board groups by picklist fields only for column headers.
6. Configure columns (Group By)
Choose a picklist field for column headings (for opportunities, this is usually StageName). Decide header style (simple text or a path-style header). Optionally choose a second grouping field if needed.
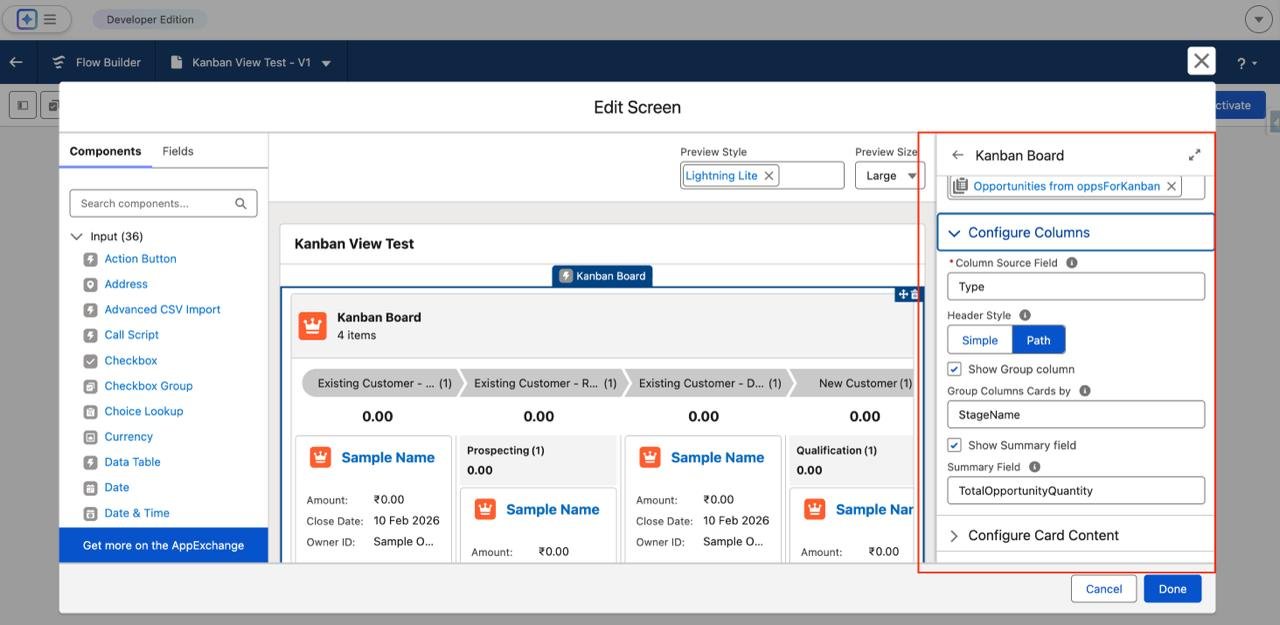
7. Configure card content
Pick a header field (for example, Name) plus up to four additional fields (for example, Amount, CloseDate, Owner, Probability). The component supports up to five fields per card. Optionally add a footer field for quick totals or secondary info.

8. Decide how to handle updates
If the board is used purely for visualisation and quick review, proceed to a confirmation or an Update Records element. If changes must be persisted (for example, a reviewer changes statuses), include elements that capture those changes and run an Update Records step.
The Kanban card display itself is driven by the source collection; persisting edits requires explicit flow logic.
9. Add navigation or actions
After the screen, add decisions, updates or final messages (use the new Message component for accessible confirmations). Save and activate the flow.
Configuration details that matter (select data source, columns, card layout)
- Select Data Source: The component expects a collection variable of sObjects. The Get Records element should include all fields that will be displayed. Using selective filtering in Get Records keeps the board fast and focused.
- Configure Columns (Group By): Columns must be based on a picklist field (for example, Stage, Status, Priority). The board will generate one column per picklist value present in the collection; A column order option controls ascending, descending, and custom ordering where supported.
- Configure Card Content: Up to five fields can be shown on each card. Choose a concise header field (Name or Subject) and include a numeric or currency field if a per-column total is useful (the component supports column summaries). Avoid clutter cards are most effective with the 2–4 most valuable fields.
Real example that can be implemented for Business (Opportunity Kanban)
This example uses Opportunities grouped by StageName and displays Name, Amount, Close Date, and Owner.
Step A: Build the Flow
- New Screen Flow (Auto-Layout).
- Get Records: Object = Opportunity. Filter = IsClosed = False AND OwnerId = [some queue or user] (or no filter for org-wide view). Sort by Amount or CloseDate. Store all fields, including StageName, Name, Amount, CloseDate, OwnerId. Output as a collection oppsForKanban.
Step B: Screen with Kanban
- Add Screen => place Kanban Board.
- Source Collection => oppsForKanban.
- Group By => StageName. Header style = Path (or Simple).
- Card Header => Name. Card fields => Amount, CloseDate, OwnerId. Footer => optional Probability.
- Summary => Enable column totals (sum of Amount).
Step C: Follow-up Action
After the screen, add a Decision: if a reviewer confirms a move or marks a record for follow-up, route to an Update Records element that updates the Opportunity fields persisted in the database. If the board is for read-only review, route to a Message screen summarizing totals.
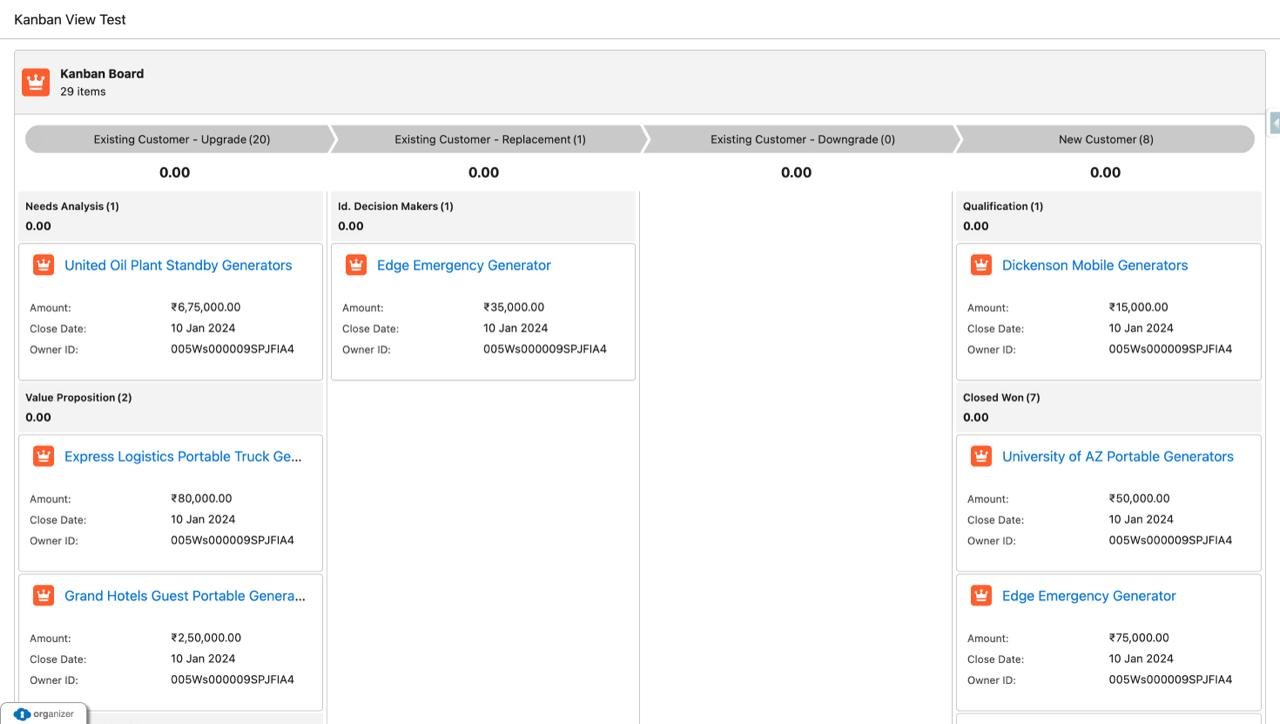
Once the above steps are implemented, our screen will look as follows:
Practical tips and issues to avoid
- Keep the collection small and relevant. Large collections slow rendering, filter records sensibly.
- Limit card fields. Using 2–4 fields for clarity and too much information makes cards hard to review.
- Be explicit about persistence. The Kanban display does not implicitly perform record updates, including Update Records steps, when edits or status changes must be saved.
- Test with different picklist values. Some picklists have many values, consider a compact subset or a custom picklist for the flow use case.
- Use summaries strategically. Column totals (counts or currency sums) are excellent for quick checks before approvals.
Also Read – Number to Word conversion using Apex
FAQs
1. Is there a Kanban board available in Salesforce Flow?
With the Spring ’26 Salesforce release, you can now create a Kanban Board using Salesforce Screen Flow.
- In Flow Builder, select New Flow -> choose Screen Flow
- Add a Get Records element to retrieve the collection
- Add a Screen element and place the Kanban board component.
Conclusion
The Kanban Board for Screen Flows in Spring ’26 makes it much easier to turn data-heavy processes into clear, visual experiences. Instead of scanning lists or reports, users can quickly see what matters, compare values, and make confident decisions right inside a Flow. Whether it’s reviewing pipelines, triaging cases, or doing quick pre-approval checks, this component helps admins build more intuitive and efficient screens without writing any custom code. It’s a small addition with a big impact on usability and adoption.
Get a complete Roadmap to Learn Salesforce Admin and Development👇


