

What is DocuSign For Salesforce?
DocuSign seamlessly integrates with Salesforce, enhancing and expediting the electronic signing process within the Salesforce system. Consequently, users gain the capability to effortlessly transmit, sign, and manage agreements directly from Salesforce, thereby significantly improving workflow efficiency for document-related tasks and ultimately saving valuable time.
What are the Benefits of using DocuSign?
- Mobile Accessibility: DocuSign can be utilized on mobile devices, enabling users to conveniently sign documents using their mobile devices.
- Automated Processes: Upon completing the signing of the document, transition to the next phase by initiating automation to meet specific requirements. This process involves facilitating automated document generation, effectively reducing manual work, and streamlining processes.
- Minimization of errors: Docusign reduces the number of errors, the need for correction, and associated delays.
- Better Customer Experience: DocuSign’s seamless integration with Salesforce enhances the customer experience, making it more pleasant and user-friendly. Within the Salesforce platform, clients can electronically sign papers, contributing to an improvement in overall customer satisfaction.
- Cost Savings: Organizations can save money by reducing their use of paper, printing, and manual processing. Reducing document processing time also helps the sales staff operate more productively and efficiently.
Installing and Using DocuSign in Salesforce
To access AppExchange, navigate from the Setup menu, then search AppExchange.

Select Go To AppExchange after clicking AppExchange Marketplace.

Upon clicking “Go to AppExchange,” the system will navigate you to the AppExchange website. From there, proceed to search for “DocuSign eSignature for Salesforce.”

Select DocuSign eSignature for Salesforce, After selecting Docusign for Salesforce, a new window appears.

Click Get It Now. A popup will confirm whether you should do it in the production or sandbox. Select Install in Production or Install in Sandbox as per your requirement.

Click on Confirm and Install.

Upon clicking “Confirm and Install,” the system will redirect you to the login screen. Enter your credentials to proceed.
Click on Install for admins only and click Install.
Once you successfully install it, you will receive an email confirming the successful installation of the package.
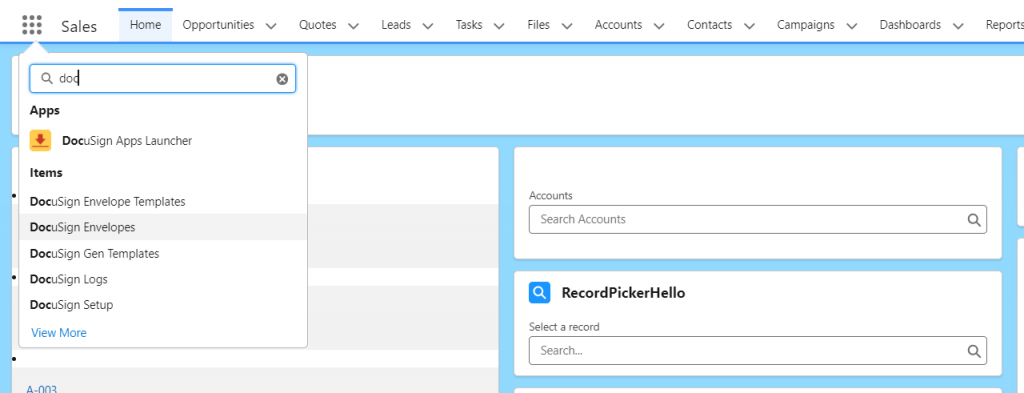
Navigate to App Launcher and search Docusign. Select DocuSign App Launcher.
Want to Learn Salesforce Flows? Checkout our Salesforce Flow Course
The first step in DocuSign is to create an account. If you already have an account, simply log in otherwise, proceed to create a new account.

Upon successfully logging into DocuSign, proceed to navigate to DocuSign Envelope Templates. Then, click on “New” to initiate the creation of a new template.
Enter the respective Name and select the Data Source as per your requirement

The initial step after creating the template is to upload a document. Click on the Upload action.

Upload the document and Click on next.

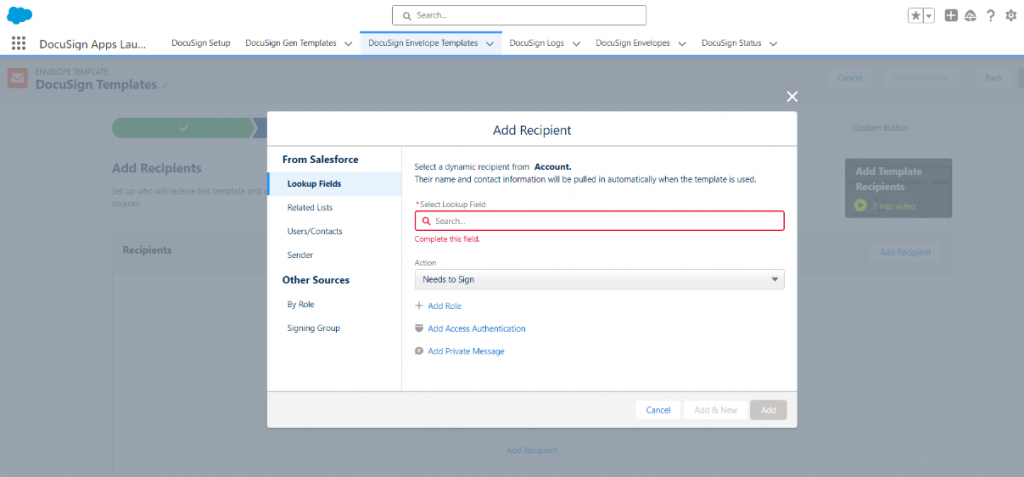
The next section is to Add Recipient, Click on Add Recipient.

Enter the lookup fields and select action.
After selecting Recipient, at the bottom, it shows the Email subject and Email Message. Update the Email Message and Email Subject accordingly based on your requirements, and these will be visible to all recipients.

Following that, merge the fields that will be included in the document as part of the subsequent step.
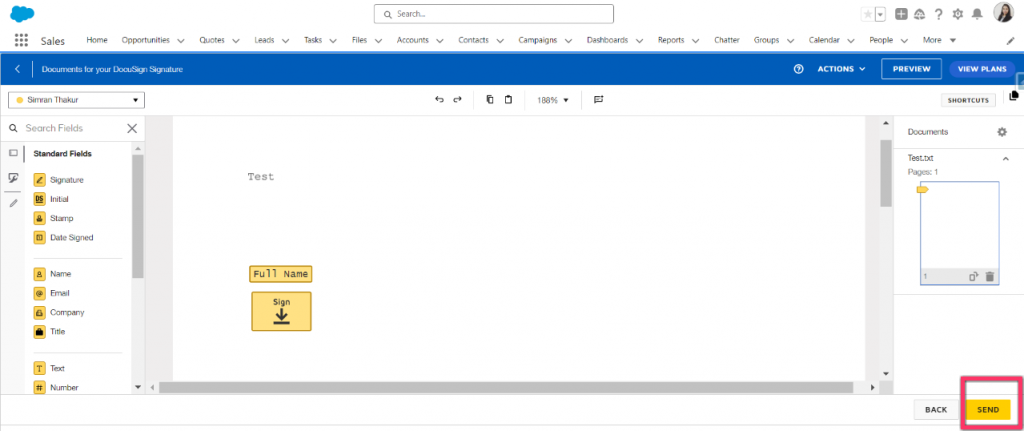
Following that, the next step involves placing the fields as needed. You have the flexibility to drag and drop standard fields based on your specific requirements. Once you have positioned the fields appropriately, click “Save and Close.”

The next step is to configure options. Firstly, options involve setting the reminder to notify the user of the document expiration. Users can specify the number of days after which the document should expire automatically. Once the reminder days and expiration days are chosen, the next consideration is checking the document writeback option.
Additionally, users can determine if any automation should take place after the document is signed. For such automation, fields can be updated under the fields update section. To proceed, click on the “Next” button.

The last step is the Custom Button. Give the respective label and the respective page layouts. Lastly, Click on Save and Finish

Woohhoo! We have created Docusign Template, Let’s see how it works. Now create Account Record and observe action is visible as Send Via Docusign.

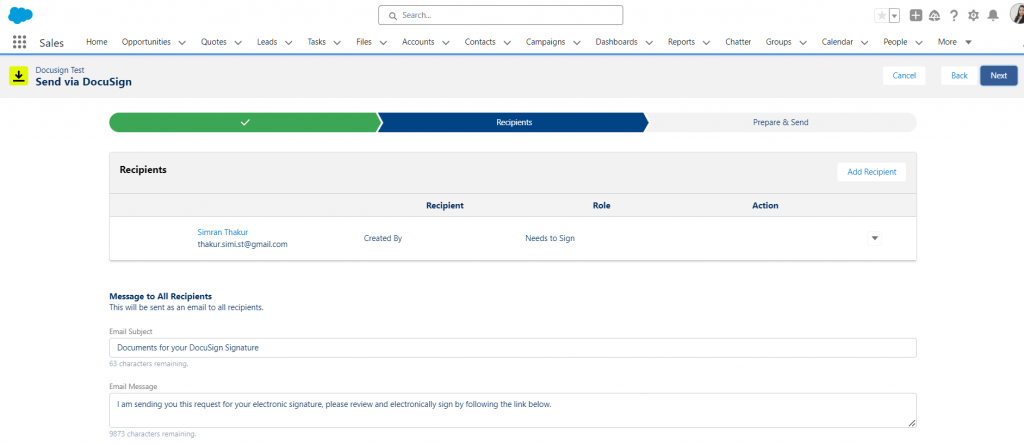
Initiate the process by clicking on the “Send Via DocuSign” action. Subsequently, a DocuSign window will appear, displaying the recently created default selected templates. Proceed by clicking “Next.”

In this section, you can review the email subject and body that will be visible to recipients. Additionally, it provides options to set reminders and the expiration date for the documents.
In the final step, preview the document before proceeding to the last action. After reviewing, click on “Send.” Upon clicking “Send,” the system will initiate the process of sending an email.
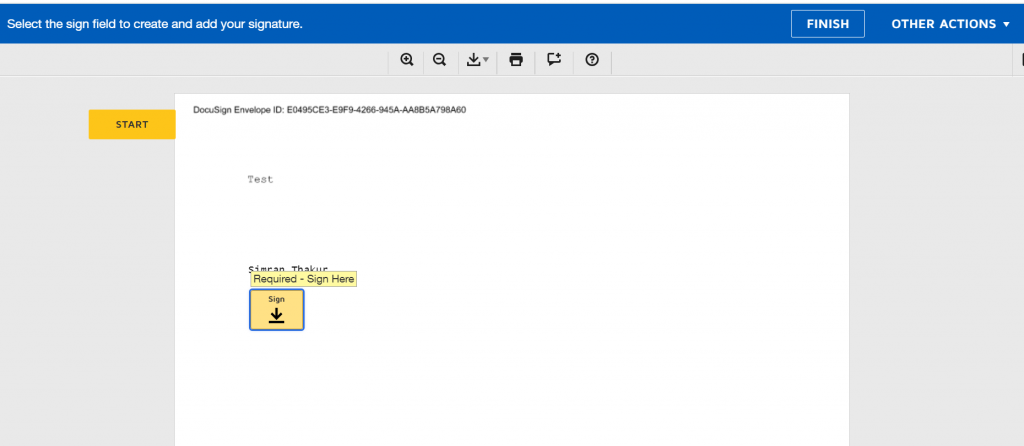
Check out the Mail and click Review Document.

Click on “Continue” to proceed with the required sign, and subsequently, click on “Finish” to complete the process.
Upon completion, you will receive an email confirming the document’s conclusion. Subsequently, take note that the Prospect rating has now been set to “Hot.”

FAQs
1. What is DocuSign gen for Salesforce?
DocuSign Gen for Salesforce makes it super easy to create professional agreements right within the Salesforce user interface with just a few clicks. It’s like a time-saving magic tool that helps you avoid mistakes and close deals more efficiently.
Remember, to install and manage Salesforce Lightning components like DocuSign Gen, you need a special Salesforce subdomain. It’s like a specific web address to make sure everything works seamlessly.
2. How to give access to DocuSign in Salesforce?
- Open the DocuSign App Launcher from the Salesforce App Launcher.
- From DocuSign Setup Navigate to user management.
- Click on the “Add Users” button and add a new user
You can have a 30-day free trial for DocuSign eSignature. Pricing for the default plan of Docusign eSignature starts at 30 USD/Month/user. They also offer special discounts for nonprofits.
Conclusion
When we combine the powers of Salesforce and Docusign, it helps to build a streamlined process for dealing with documents. This not only makes things quicker but also makes sure everything is accurate. It’s like fine-tuning how we handle documents, making the whole experience better for everyone involved.


