

Salesforce Flows evolve over time, but keeping track of what changed between versions isn’t always easy. One small update to a formula or decision logic can cause unexpected issues if not reviewed carefully.
Whether you’re debugging, testing, or preparing for deployment, knowing exactly what changed helps avoid mistakes and keeps your automations running smoothly.
In this blog, we’ll explore three ways to compare Flow versions:
- Using native tools
- Using CLI methods
- Using DevOps platforms
Why Comparing Flow Versions is Important?
When working with Flows in Salesforce, it’s easy to create new versions without fully tracking what changed. One small update, like tweaking a decision condition or modifying a formula, can impact the entire logic and break business processes without warning.
Salesforce Flow version comparison is important because –
- It spots small logic mistakes before they cause issues in production.
- Quickly identify what changed to streamline QA and peer reviews.
- Keep a clear record of changes for approvals, audits, or documentation.
- Ensure consistency between sandbox, UAT, and production Flows.
How to Compare Flow Versions in Salesforce?
In this section, we’ll walk through:
- A built-in option to compare Flow versions in Flow Builder.
- A developer-friendly method using Salesforce CLI and VS Code.
- Visual comparisons using third-party DevOps tools like Gearset.
1. Compare Flow Versions in Flow Builder
Salesforce has introduced a native “Compare Versions” feature in Flow Builder, starting with the Winter ’26 release. It allows you to visually compare two versions of the same Flow, highlighting changes in elements, resources, and logic in a simple diff view.
How to use it:
- Open the Flow in Flow Builder.
- Click the “Version” dropdown in the action button.
- Select “Compare Versions”.
- Pick any two versions of the same Flow.
- The screen displays:
- A diff view with added, removed, or changed elements
- Colour-coded highlights for quick comparison
- A table summarizing changes


2. Compare Flow Versions Using Salesforce CLI and VS Code
If you need a deeper, behind-the-scenes look at what changed between two versions of a Flow, the Salesforce CLI + VS Code method is your best bet. This approach compares the actual metadata behind the Flow and shows you exactly which elements, formulas, or configurations were added, removed, or edited.
It takes a little setup, but once you’re ready, it’s one of the most accurate and flexible ways to do a Salesforce Flow version comparison.
Step 1: Authorize Your Org
In your VS Code, press cmd+shift+p (for Mac) OR ctrl+shift+p (for Windows)
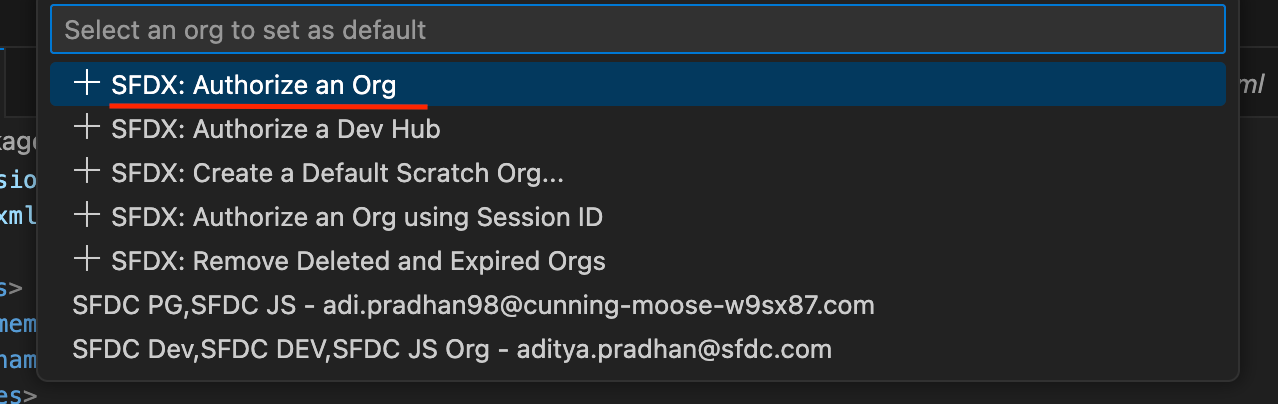
Step 2: Select Your Org and Authenticate
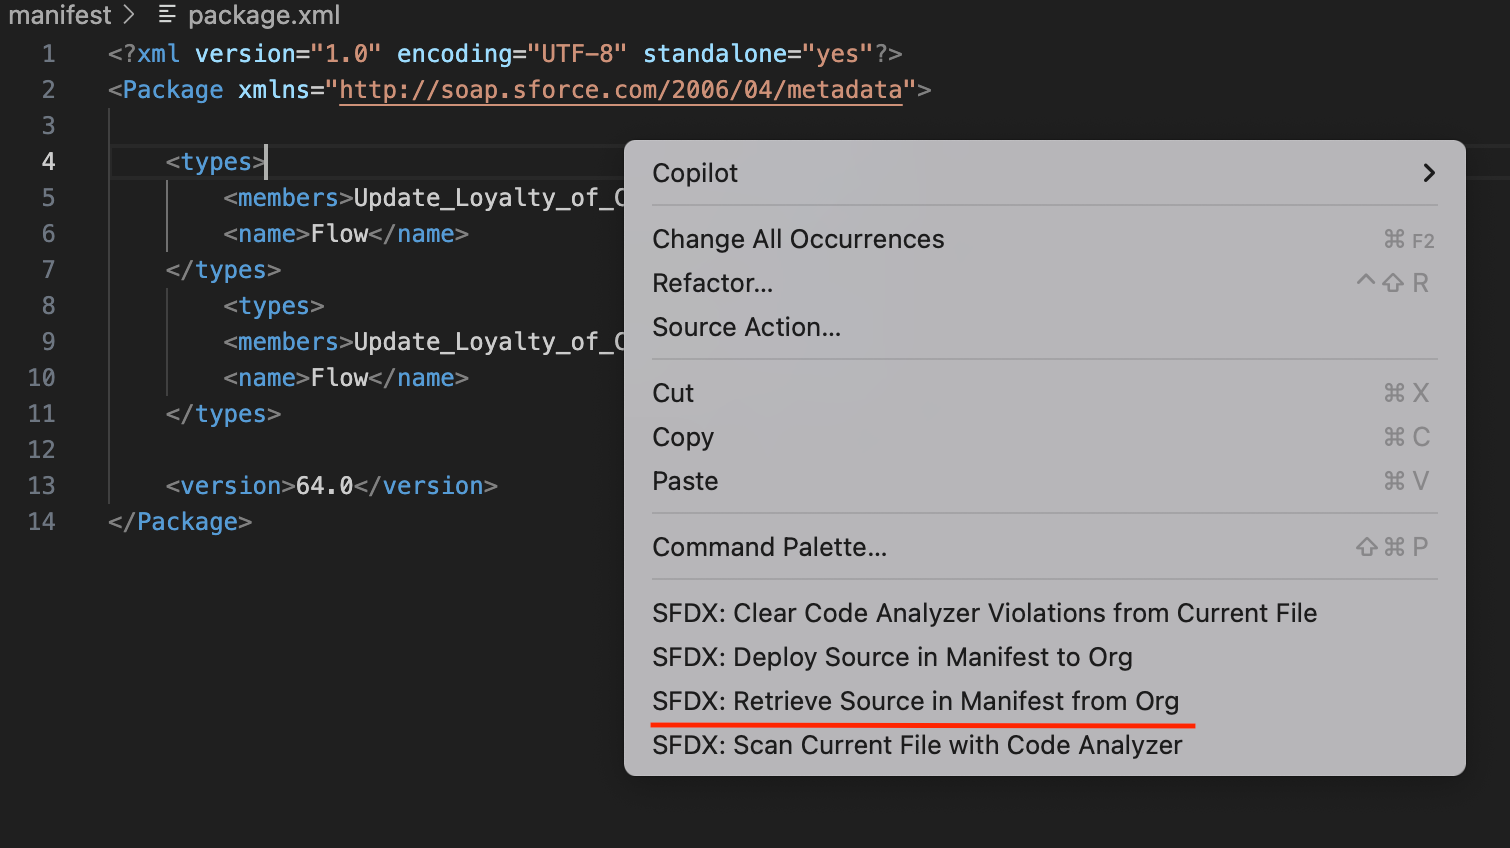
Step 3: Retrieve Flow Metadata
To retrieve specific versions of a Flow, you’ll first need the API name of the Flow. Then update the package.xml with the Flow names, then right-click and select Retrieve Source in Manifest from Org.
This pulls all versions of the Flow into your project under /force-app/main/default/flows.
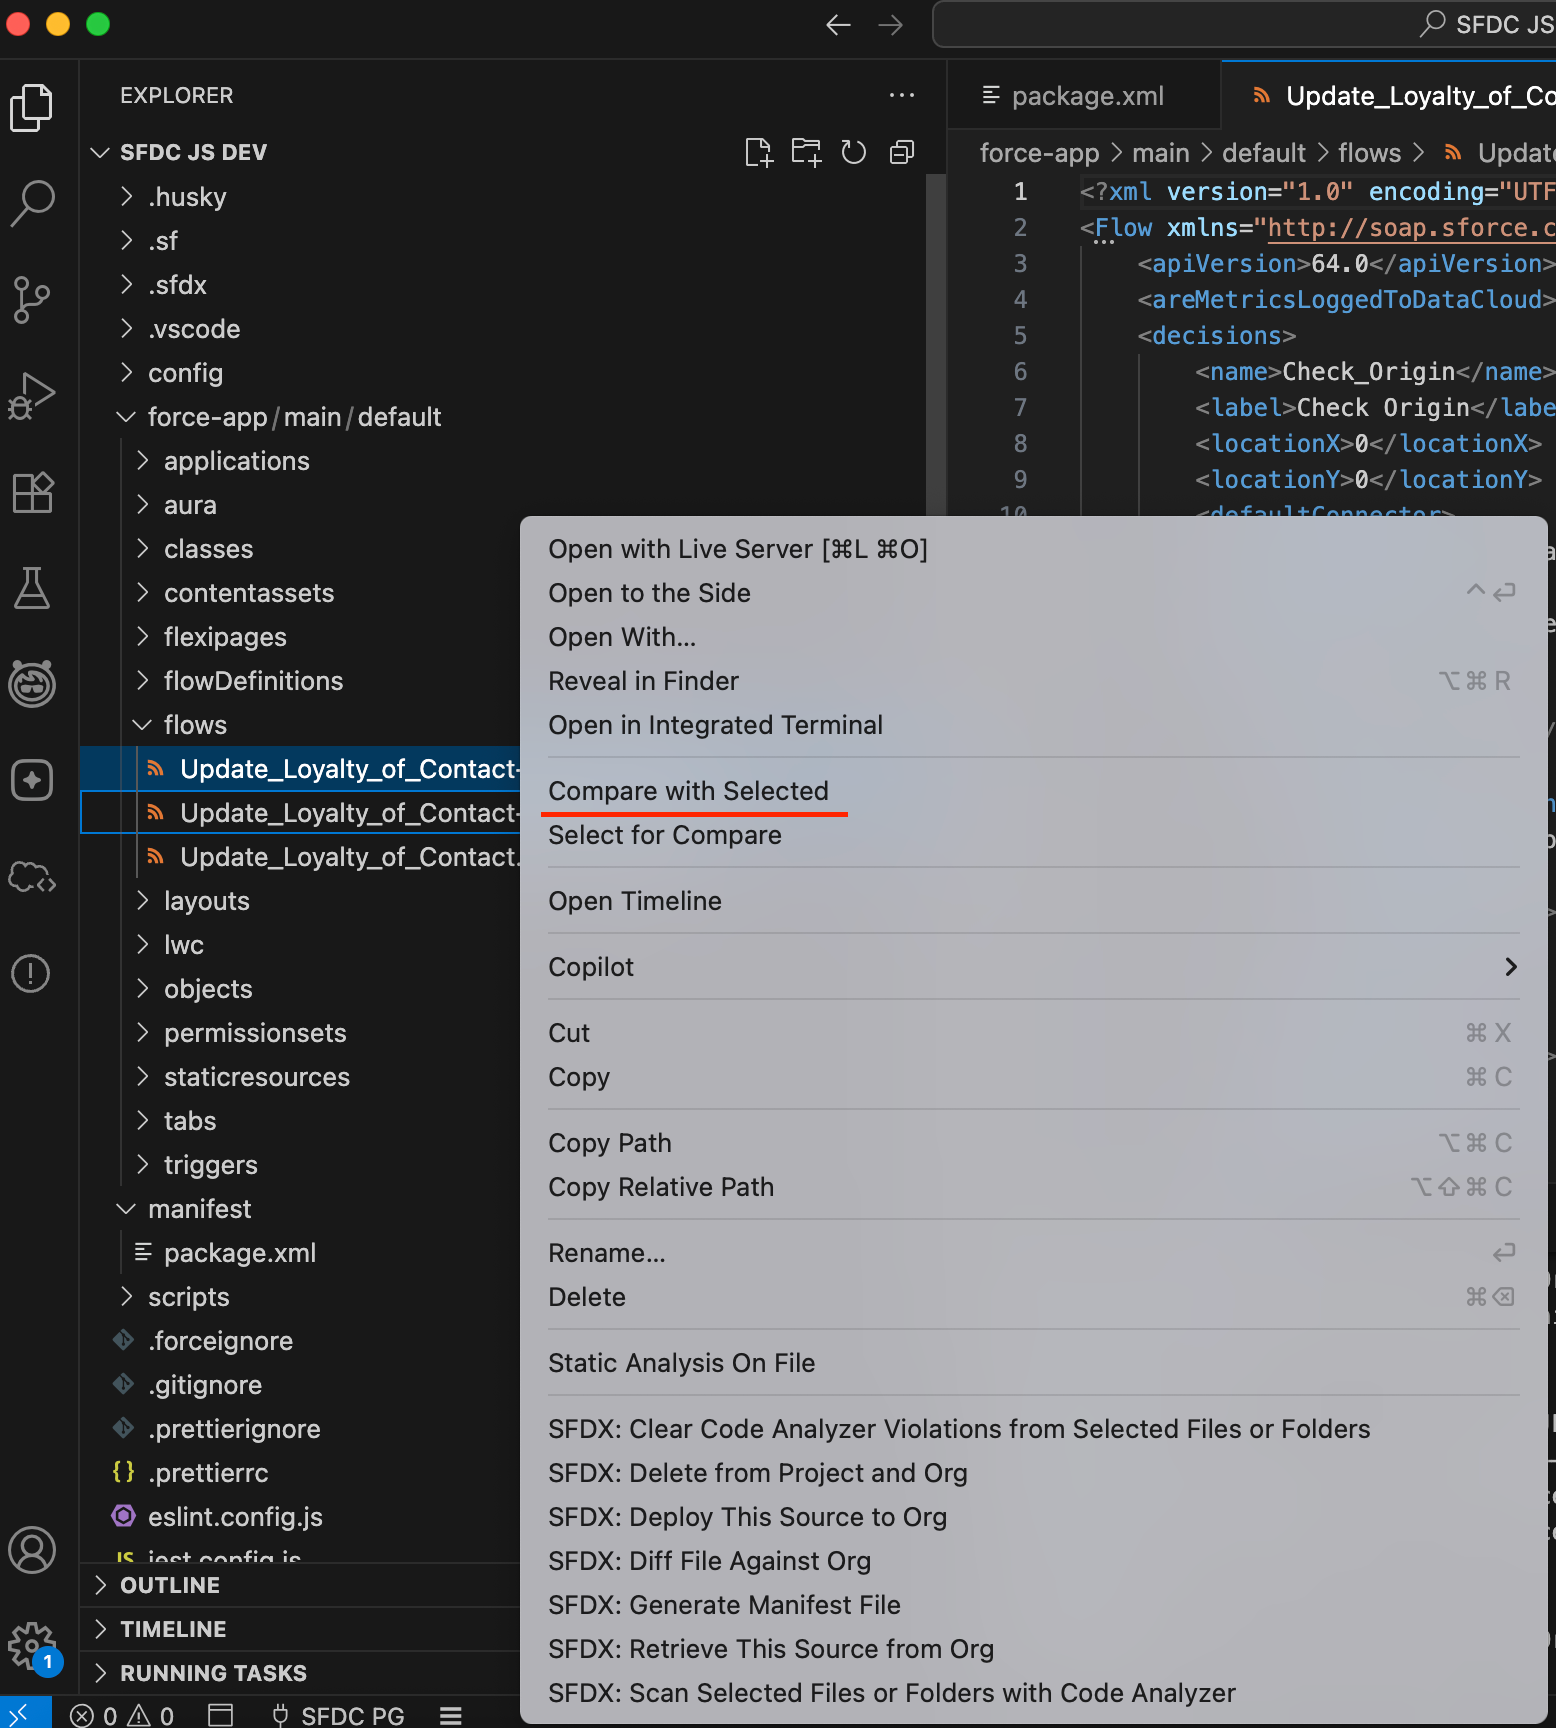
Step 4: Use VS Code’s Side-by-Side Diff
In VS Code:
- Open both versions of the Flow (e.g.,
FlowName-5.flow-meta.xmlandFlowName-7.flow-meta.xml) - Right-click on the file → “Select for Compare”
- Then right-click the second file → “Compare with Selected”
You’ll now see:
- Which lines were added, removed, or changed
- Updates to formulas, decision conditions, variable definitions, etc.

3. Comparing Flow Versions with Third-Party DevOps Tools
For teams working with complex Salesforce deployments, DevOps tools like Gearset, Copado, and AutoRABIT offer a more automated way to compare Flow versions, especially across environments like Dev, QA, and Production.
These platforms are designed to handle metadata changes, including Flows, and often include built-in features to:
- Compare two versions of a Flow side-by-side
- Highlight added, removed, or changed elements
- Track Flow version history over time
- Bundle changes for deployment
They’re especially useful in environments where multiple admins and developers are working on the same Flows and you need better visibility and control.
Looking to learn Salesforce Flow? Check out the complete Salesforce Flow Mastery Course here
FAQs
1. Can I compare two flow versions directly in Salesforce?
Yes, if your org has the Winter ’26 update, the Flow Builder now includes a “Compare Versions” button that shows a visual diff between two versions. If you don’t see it, you can still compare Flows using manual or CLI methods.
2. What’s the easiest way to compare Flows for non-developers?
With the Salesforce Winter ’26 update, you can compare the different Flow versions using the ‘Compare Versions’ button in the Flow Builder.
3. Can I compare versions across environments (e.g., Dev vs Prod)?
Not directly in Salesforce, but tools like Gearset or Copado let you compare Flows across environments, great for deployments and team collaboration.
4. Does Salesforce keep every version of a Flow?
Yes. Each time you click “Save as New Version”, Salesforce stores that version. However, only one version can be active at a time, and older versions stay in your org until deleted.
5. Is there a way to export the comparison report?
Not natively. If you’re using Salesforce CLI or DevOps tools, you can compare metadata files and manually share those diffs (e.g., via PDF or GitHub). The native Compare button doesn’t support export yet.
Conclusion
Flows are one of the most powerful automation tools in Salesforce, but keeping track of what’s changed between versions can quickly become a challenge, especially as your org grows or your team expands.
Fortunately, there are multiple ways to handle Salesforce Flow version comparison, and each method has its own strengths. Knowing which one to use when can help you catch issues early, improve collaboration, and maintain cleaner, more reliable automation.
Whether you’re an admin making small updates or a developer deploying at scale, comparing Flow versions is a simple habit that can save you hours of debugging and rework.


